
Release 2.32 – Tuesday, June 5, 2018
General
EasyScheduling Tasks
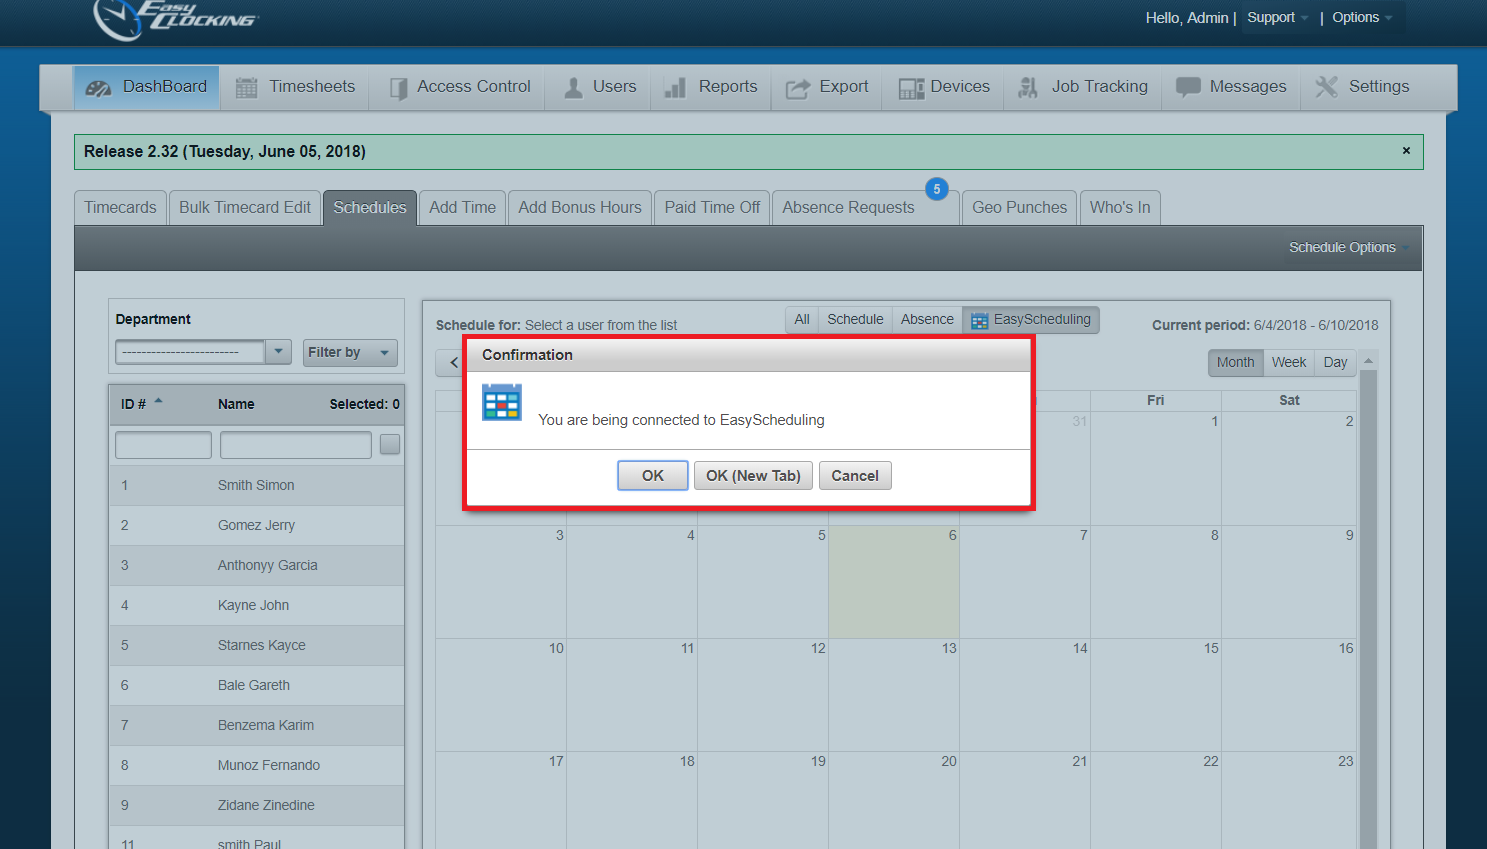
We have made new UI changes to our EasyClocking Scheduling tab, that will reflect when connecting EasyClocking to EasyScheduling. To connect to EasyScheduling from EasyClocking, navigate to the following:
- Dashboard
- Schedules
- Click the EasyScheduling button.
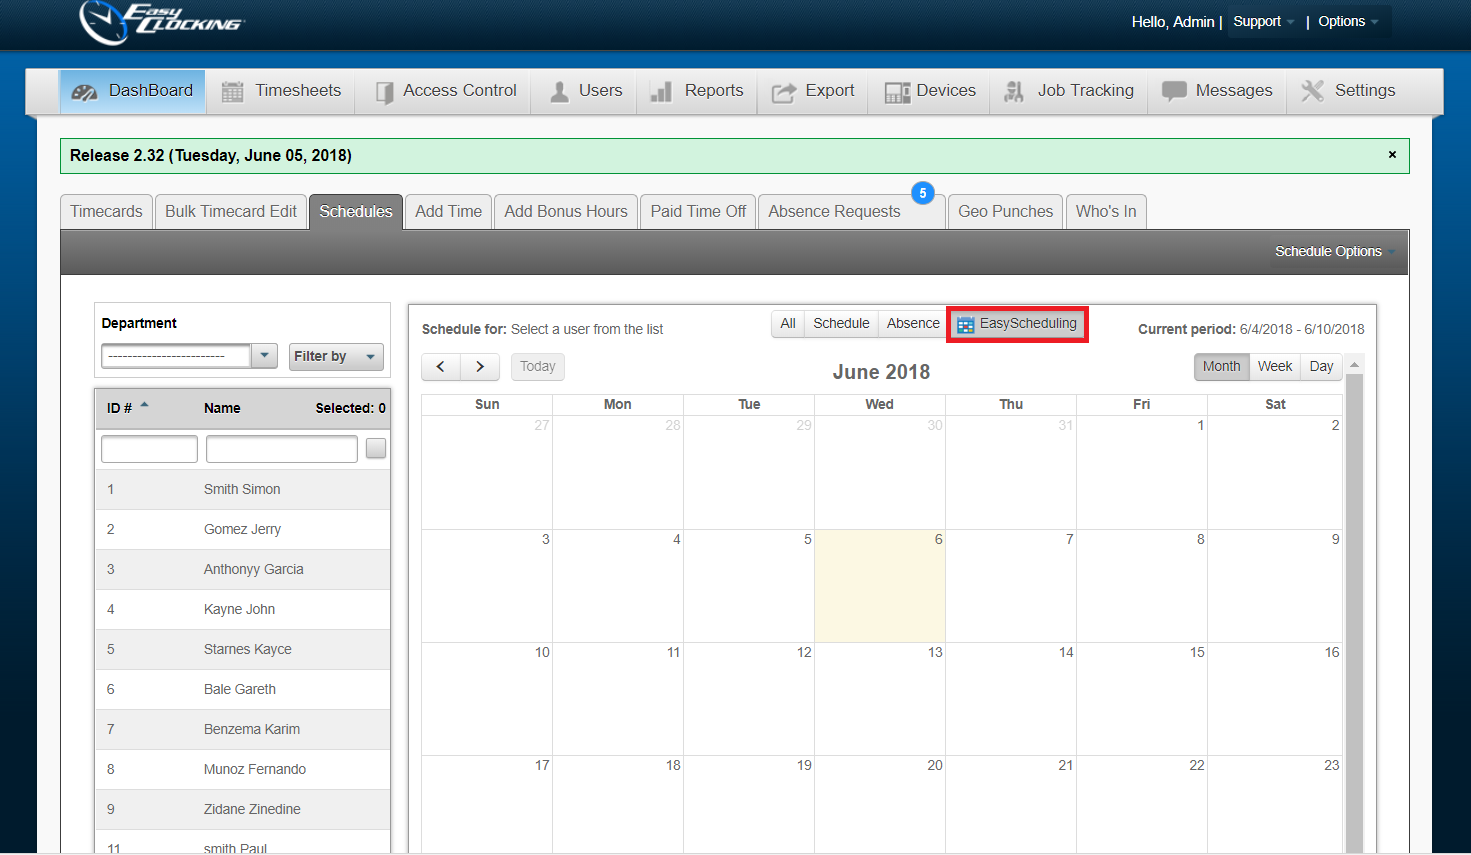
Once you have clicked on the EasyScheduling button, you will be prompted with the option to confirm and be redirected within the same tab (OK) or redirected to a new tab (OK (New Tab.) You will also have the Cancel button to opt out of being redirected.
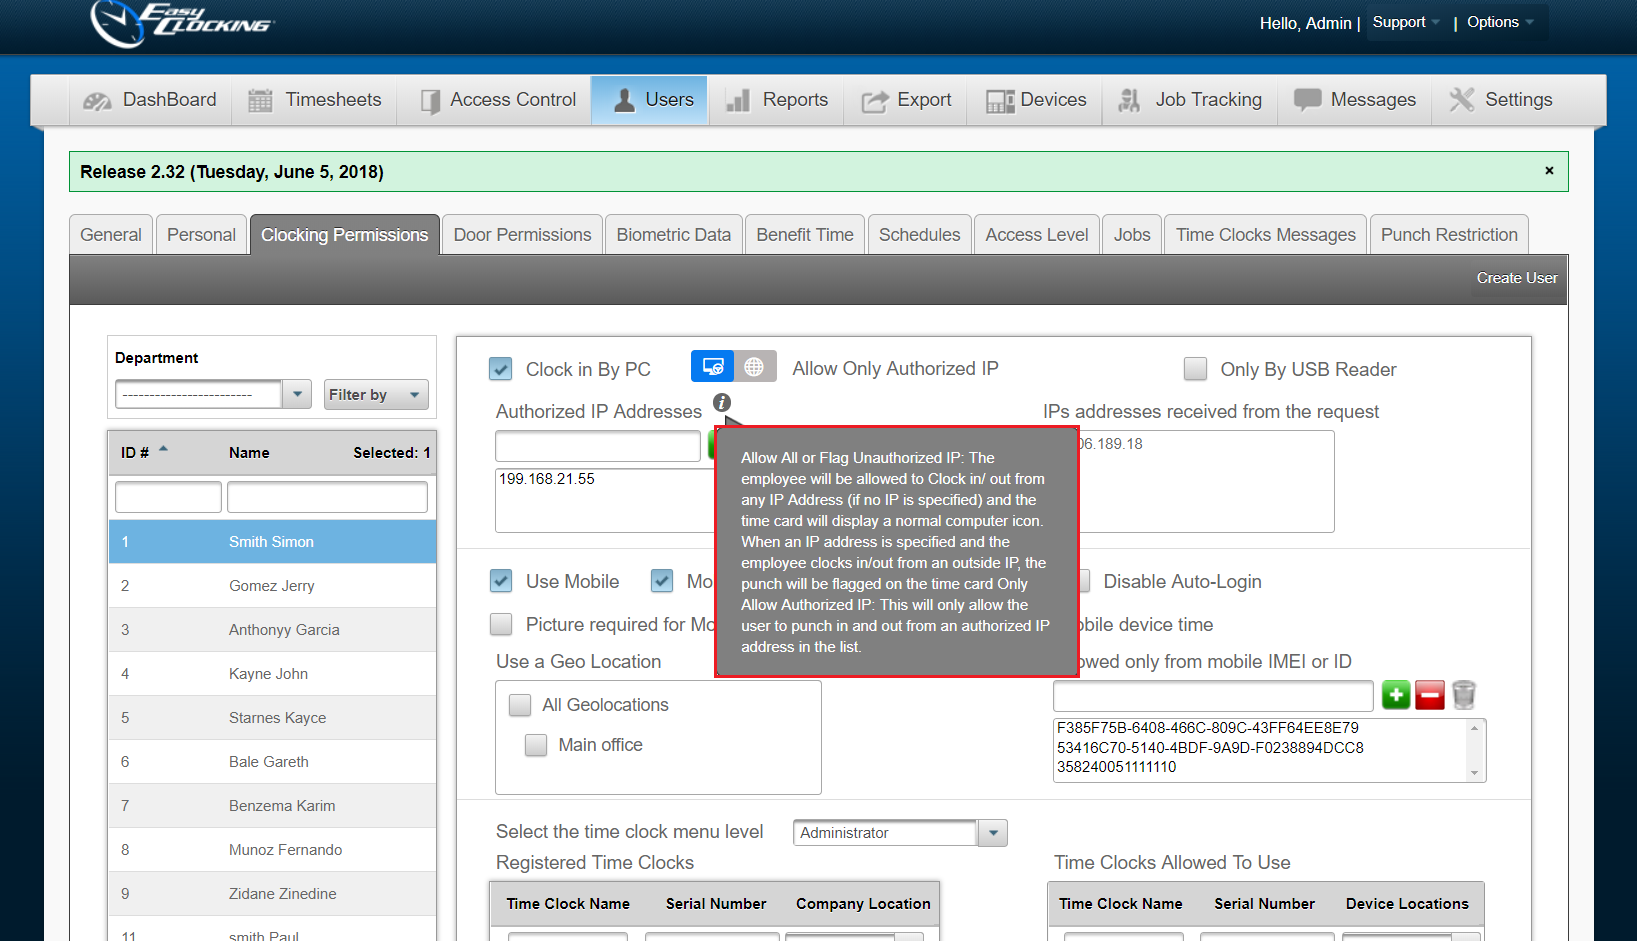
Clock in by PC – Change the information box to elaborate on what each rule does.
Updates have been made to the Clock in by PC information box “ℹ” to coincide with the technical changes that have been made in the software. Refer to the red outlines in the image below.
New Features
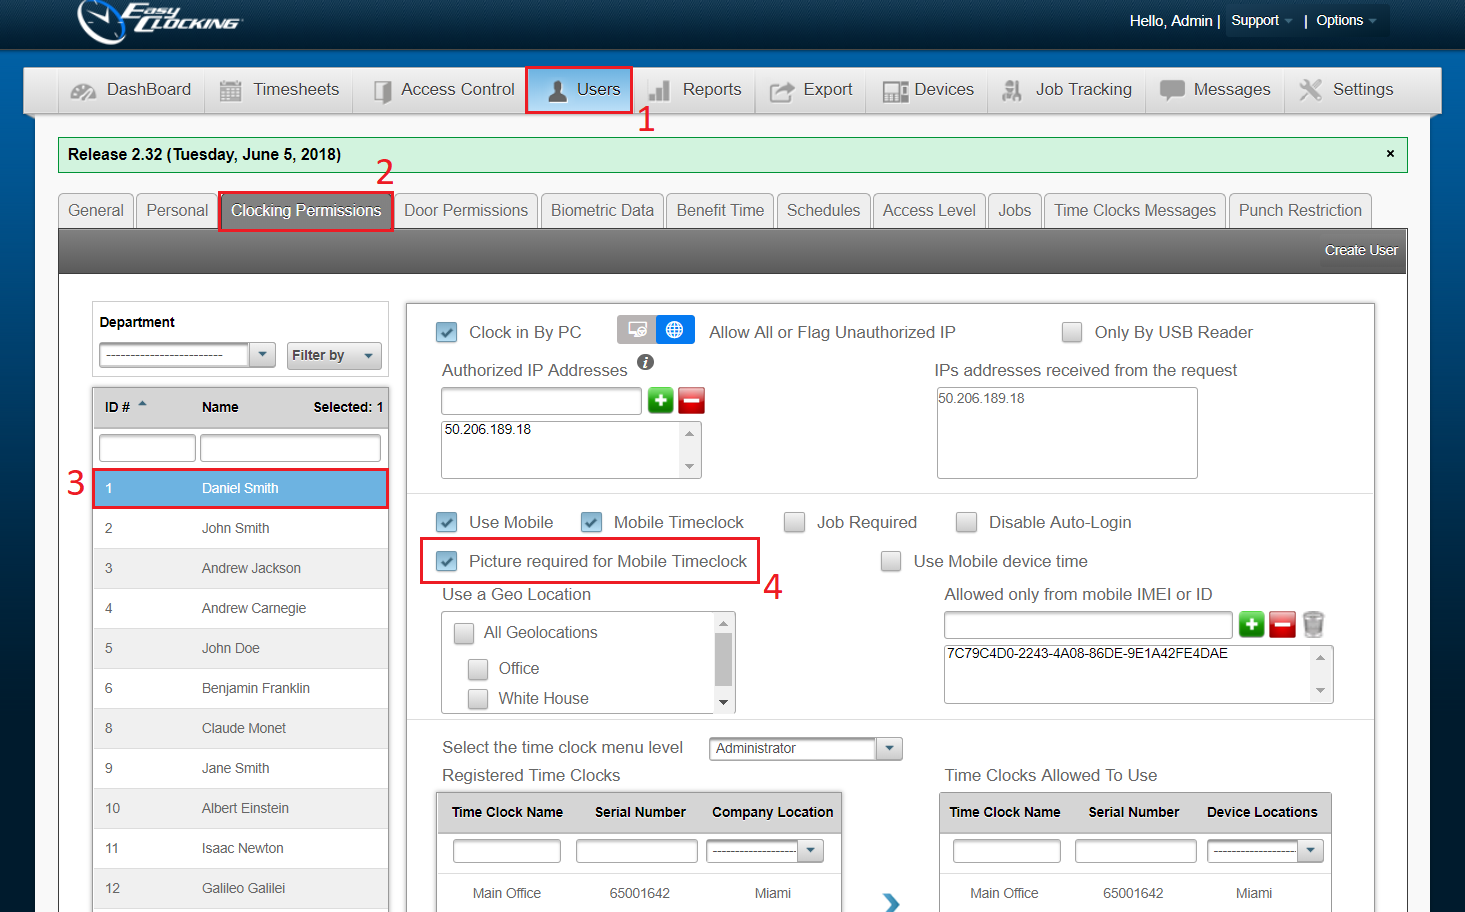
Picture Verification
We have developed a new feature for our Mobile Application which will require a User to take a picture of themselves upon clocking In or Out. This feature will be a setting under the User’s Clocking Permissions. Upon enabling, the User will need to press the Clock In or Out button and will then be prompted to take a picture. This picture can be used to verify the identity of the User and can also be seen on the Timecard per each individual punch.
To enable this setting, navigate to:
- Users
- Clocking Permissions
- Select a User
- Enable the setting by clicking the check-mark box for Picture Required for Mobile Time Clock.
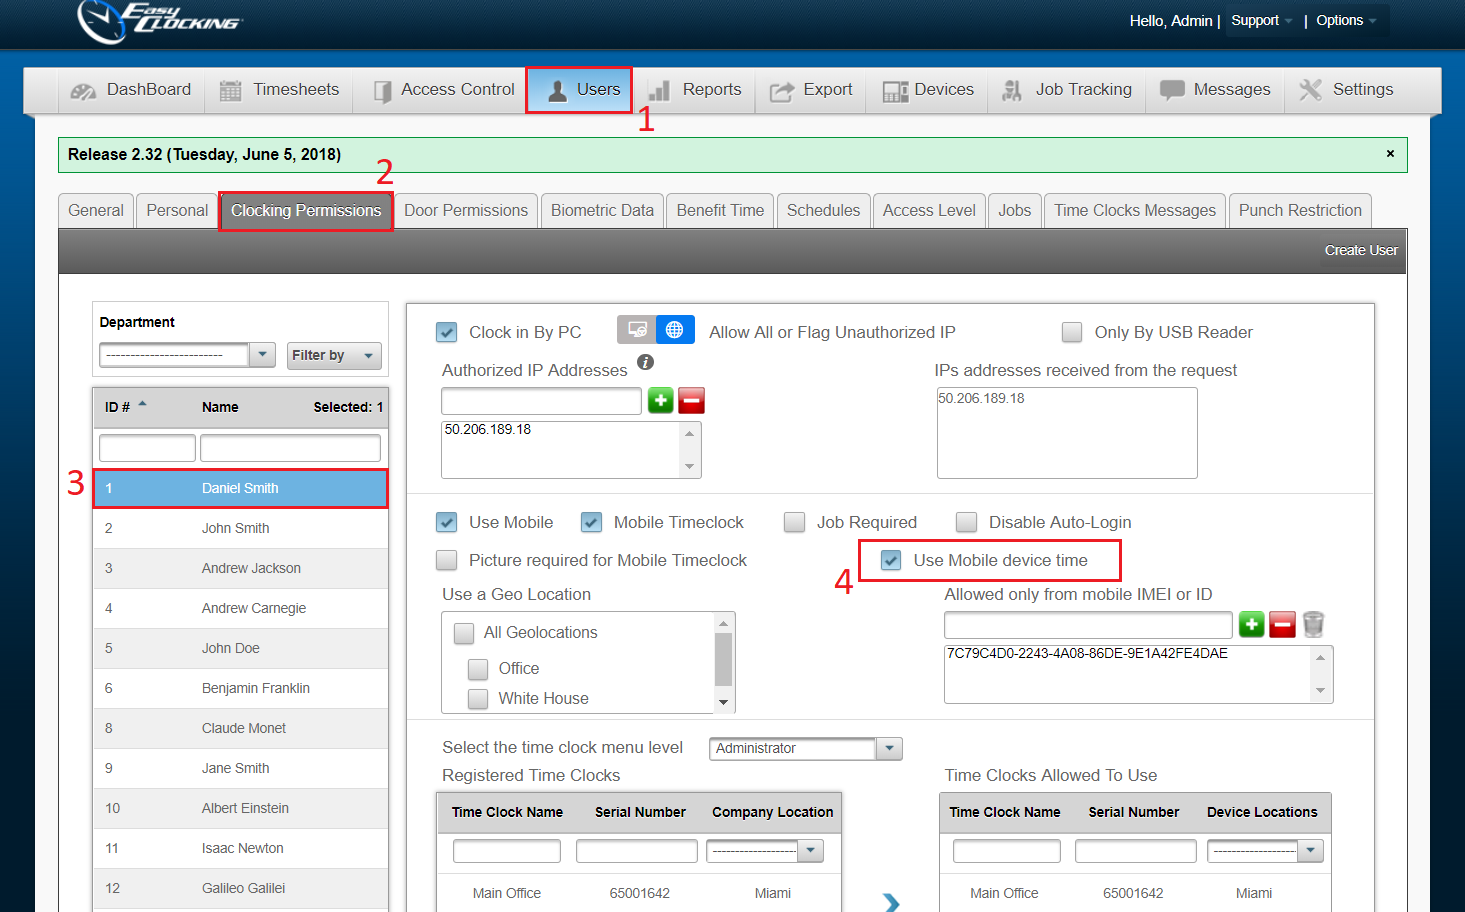
Mobile Punch: Option to register the punch time using the phone’s physical location instead of the User Location.
We have developed a new feature that will allow an Administrator to choose whether to record the punch time per the User Location or the phone’s Physical Location. Previously, the software default was always the User’s location, which is assigned when entering their general information. This feature will benefit clients who have employees that travel across time-zones. To enable this setting, navigate to:
- Users
- Clocking Permissions
- Select a User
- Enable the setting by clicking the check-mark box for Use Mobile device time.
Xenio task – Audit: Management approval of OT for user’s who work hours outside of their scheduled shift.
A feature will be available on the time-clock that will assist in OT management. Any employee who clocks-in or out outside of their scheduled shift-time, will be prompted with a confirmation box. Essentially, the user will be asked if their OT was approved. If Yes, the system will clock the user in/out at the approved time. If No, the system will clock the user in/out at the scheduled shift-time. Please contact our Technical Support Help Desk if you are interested in enabling this setting on your device.
Enhancements
Search and Order by Name in Projects and Jobs
We have extended the ability to search through Projects and Jobs to the Timecard. Now, when editing a Project or a Job on the Users Timecard, you will be able to search through all Project and Job names.
