Release 2.20.1 – Friday, December 2, 2016
Schedule Templates
The software now allows customers to create templates of schedules for certain Location/Department combinations. The template will be created with a certain effective date for the schedule. If new employees are added to the software, and they are assigned to a location and department combination that has a schedule template, the employee will be assigned that schedule. If an employee is changed to another location/department combination, they will be assigned the schedule effective their next pay period and their old schedules will be removed.
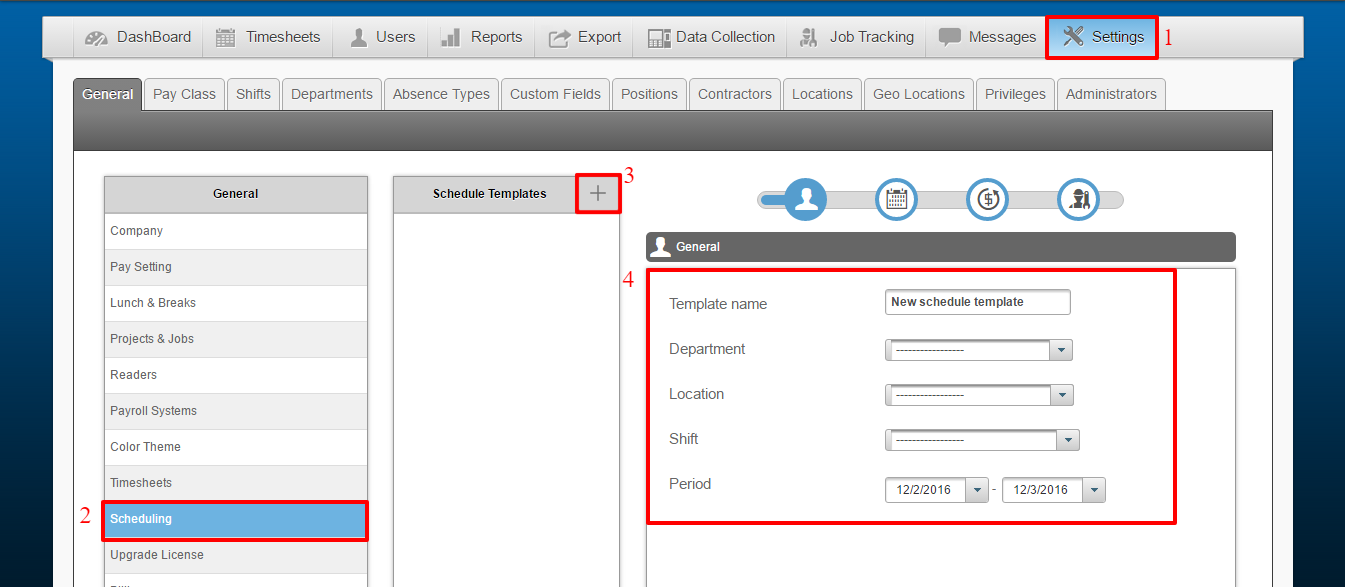
To create a schedule template, follow these steps:
- Click on SETTINGS
- Select SCHEDULING on the left-hand side of the screen
- Press the “+” icon to create a new schedule template
- Enter the information for the schedule template – keep in mind that the template requires ALL information. If you have not created a shift you will need to do so before creating the shift template. Please refer to Creating Shifts to learn how to create shifts in Easy Clocking.
5. Select the Calendar Icon to move on to the next screen – on this screen you will set the recurrence pattern for the schedule template.
6. Select if the schedule will be repeated daily, weekly, or monthly and select the days of the week that this schedule will be created for.

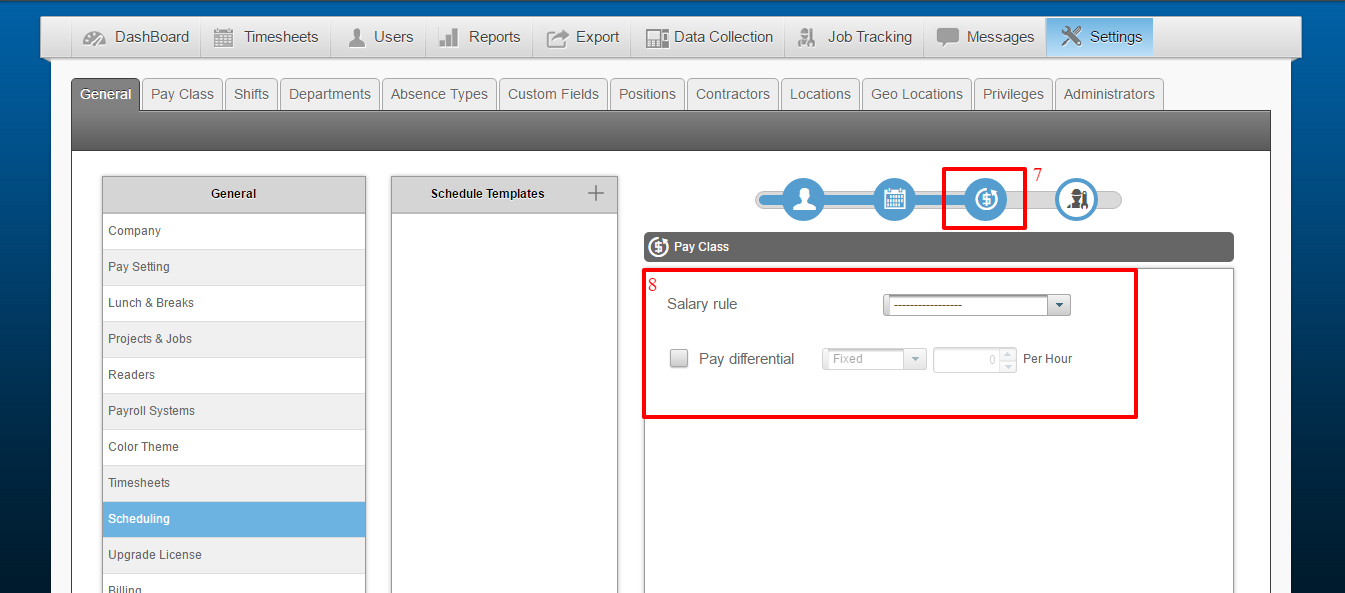
7. Select the next available icon to create any salary rules that may be needed for this schedule template
8. Select the Pay Class that will be assigned to this schedule (if different from the default pay class)
9. Select the final icon to assign any needed projects/jobs
10. Assign the project/ job (if any) and click SAVE
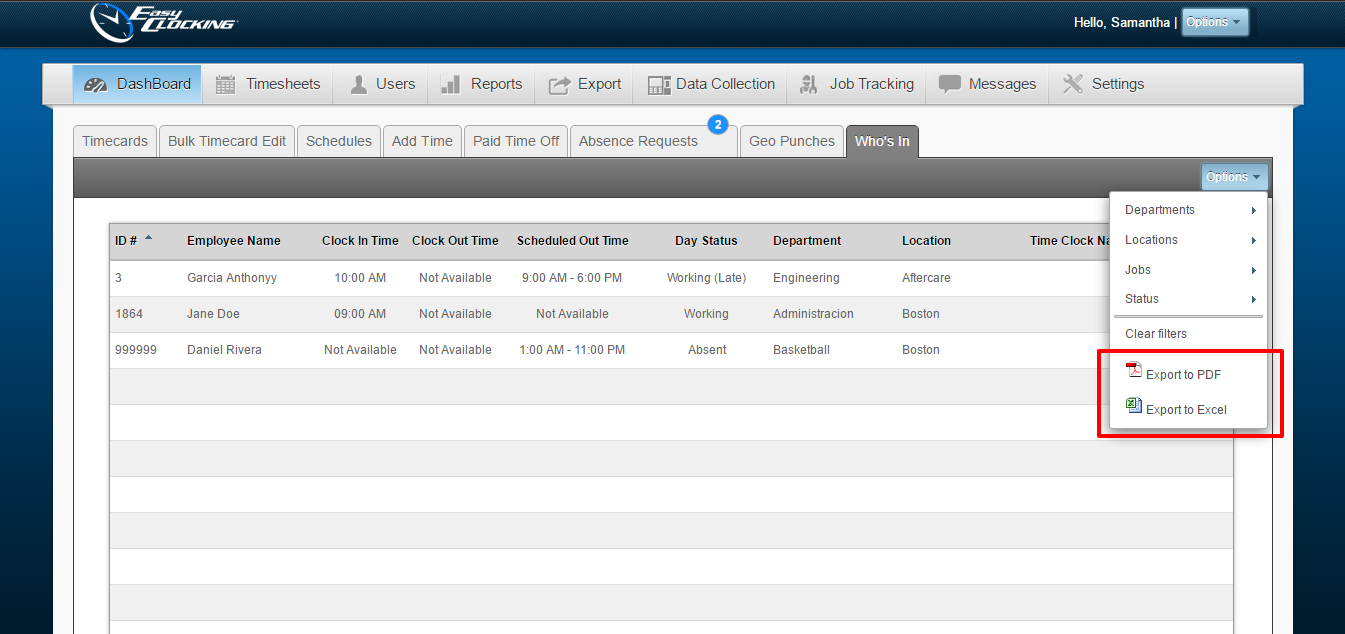
Who’s In – Excel Format Report
There is a new format available for the Who’s In report. To access the Who’s in report in Excel format, select OPTIONS and the icon for Excel Format. It will automatically download or prompt to save the file, based on the PC settings.
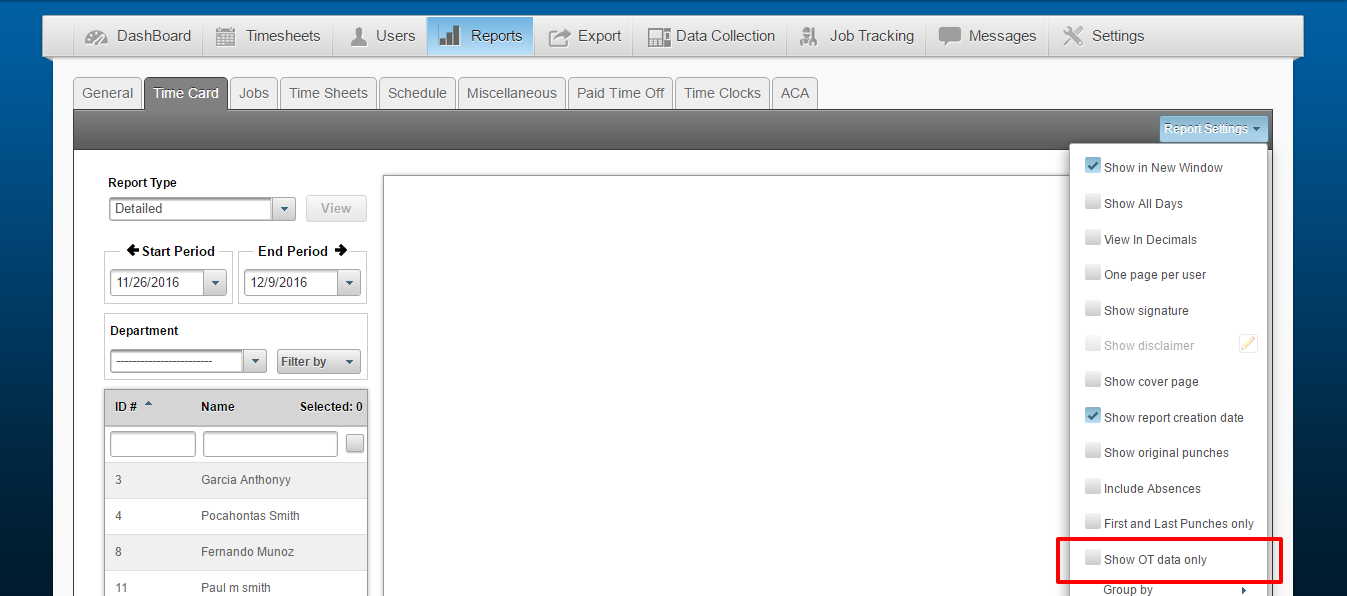
Over Time Report
Reporting is now available for employees who generate Over Time hours in any given period. This feature is compatible with ALL available reports. If this feature is enabled, the report that is selected will only be generated for employees who have generated Over Time hours. For example, if you choose to run a Detailed Time Card Report, and you enable the OT Data feature, the report will filter out the employees who do NOT have OT hours, and the only employees that will appear on the report will be employees who have generated OT hours in the selected pay period.
To enable this feature, please refer to the picture below:
1. Select the report type, pay period dates, and employees
2. Under REPORT SETTINGS select and enable the option for SHOW OT DATA ONLY
This will generate the report, only with employees with OT data.