Release 2.19 – Friday, September 16, 2016
Paying Unplanned Work
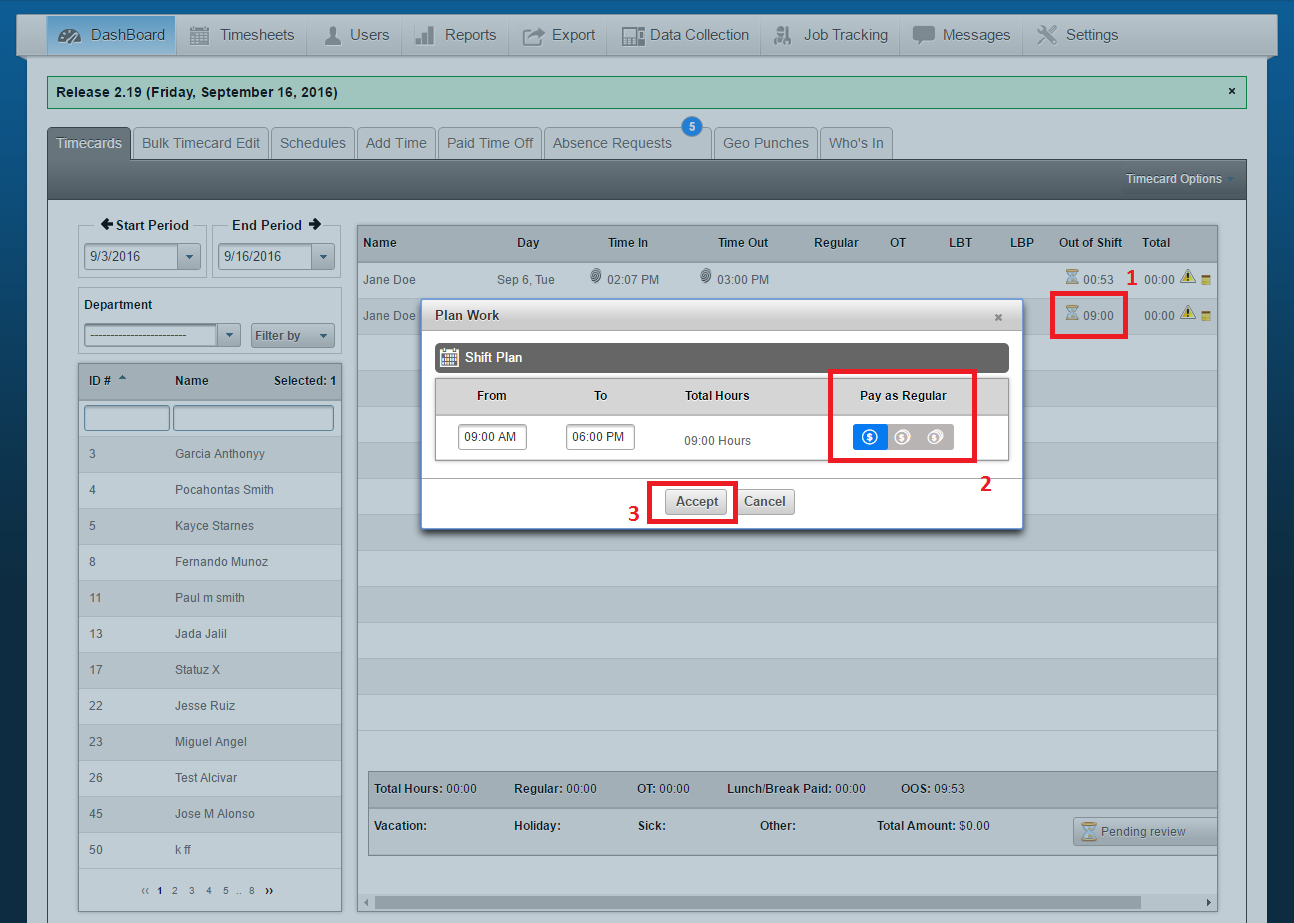
When employees work a shift that they are not scheduled for, you will now have the option to specify if that unplanned shift should be paid as Regular, Over Time, or Double Time hours.
To specify how the unplanned work hours should be paid, you can do the following:
- Select the icon on the unplanned shift.
- Switch between the different pay icons to select the way these hours should be paid (Regular, Over Time, or Double Time)
- Click on Accept to save
Device Filter
You will now have the option to filter devices in the Data Collection section of the software. Devices can now be filtered by location and whether the device is Online/Offline.
The following steps will allow you to use the device filter feature in Data Collection:
- Click on Data Collection
- Use the icons under the Status section:
 is used to see the list of ALL clocks
  is used to see the list of the ONLINE clocks and
  is used to see the list of the OFFLINE clocks
 - Clicking on Options will allow you to Add Time clock and filter your time clocks by location

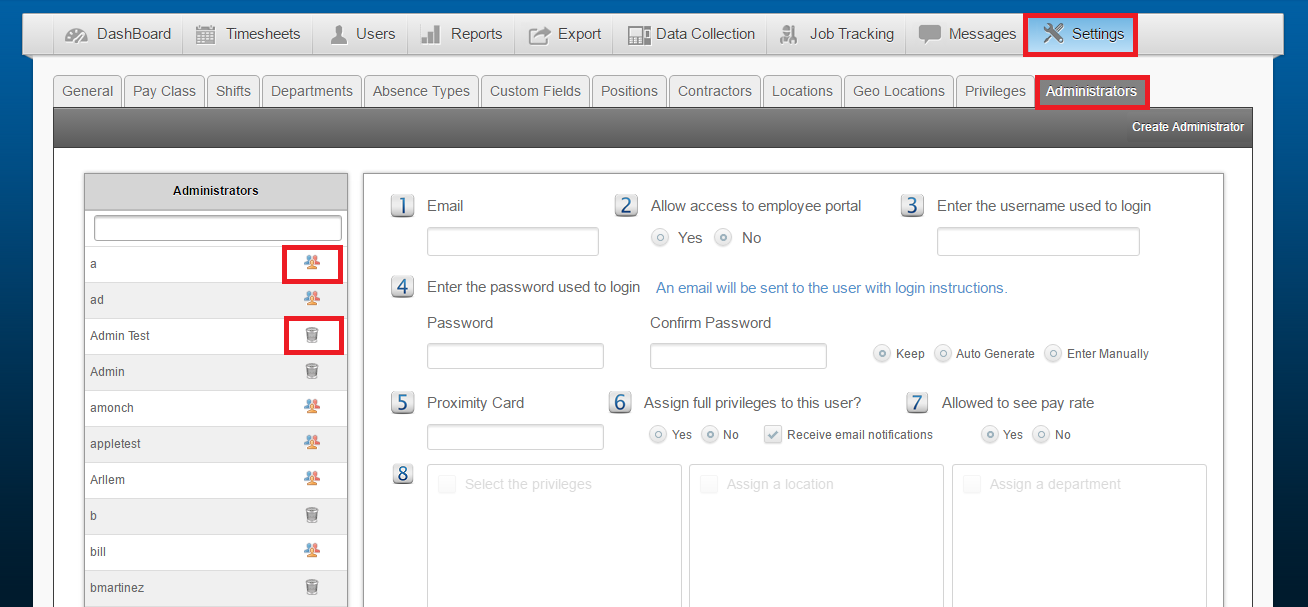
Admin/Employee Indicator
Under the Administrators sub-tab in settings, you will now see an icon next to each administrative username. The trash can icon will appear next to the users that solely have administrative access. There will also be a new “Admin” icon that will be next to the users that are employee users with administrative access.
Tying Absence Types
Users will now be able to create absence types that can be tied to another absence type. This will allow the joined absence types to share the hours available in their bucket. For example, you can create a custom absence type named “Injury” and have this absence type tie to the “Sick” absence type which has hours already accrued. This allows companies to label the absences more specifically, but still only have one bucket of hours in which the hours come from.
Note: The custom absence type that you will be tying, can ONLY be tied to a Mandatory absence type in the software
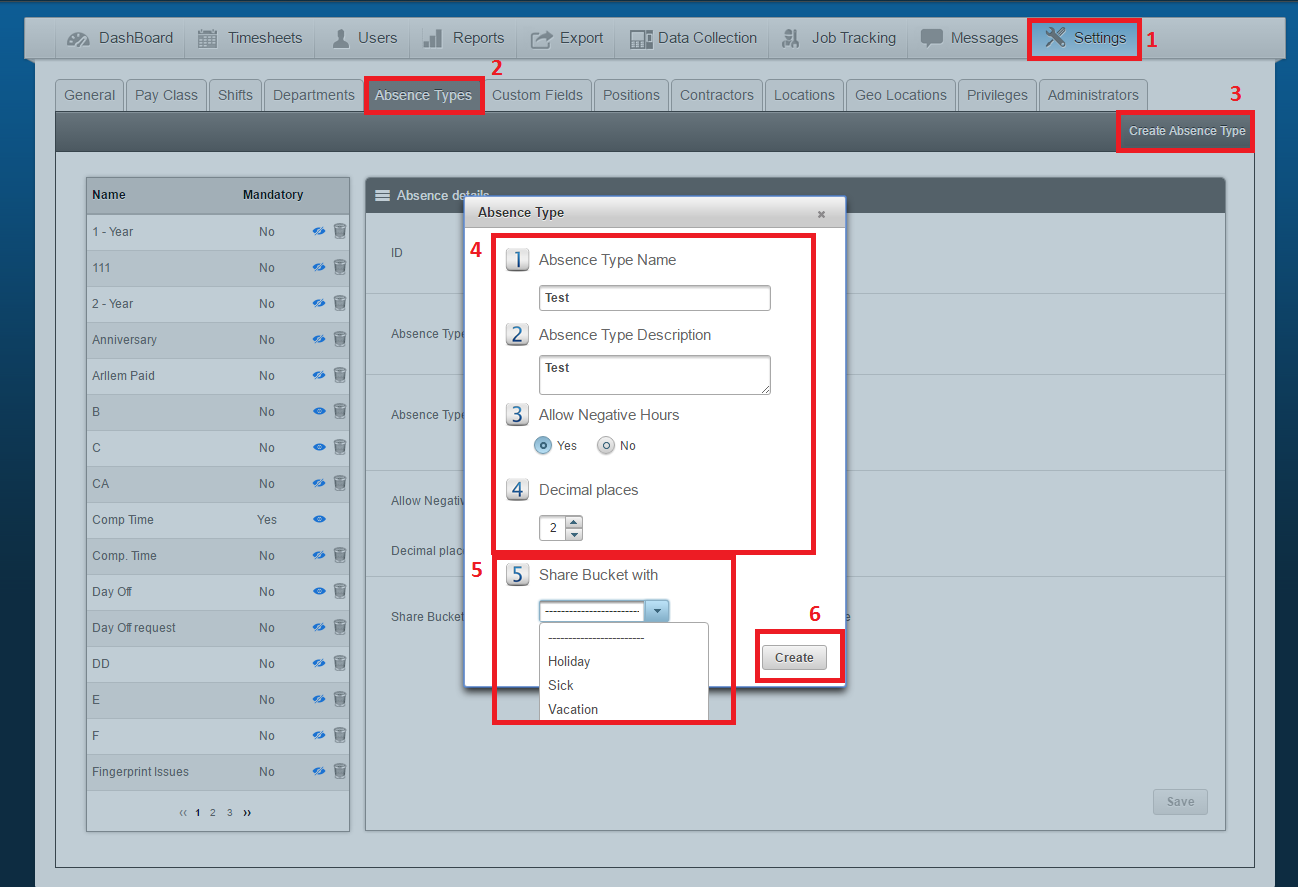
Tying Absence Types for NEW custom absences
- Settings
- Absence Types
- Create Absence Types
- Enter information for custom absence
- Select the mandatory absence type that you would like to share your bucket with
- Click on Create
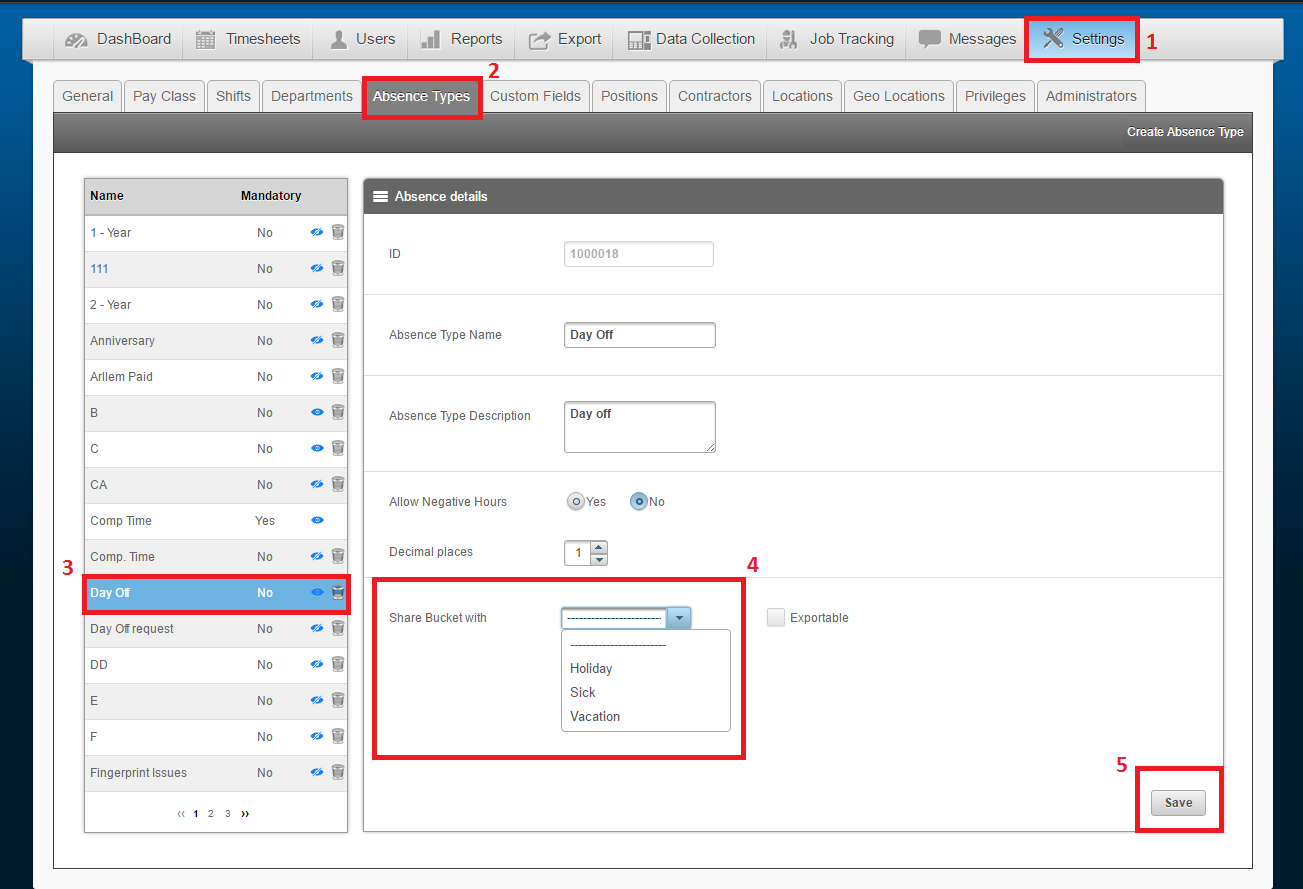
Tying Absence Types for CURRENT custom absences
- Settings
- Absence Types
- Select the current custom absence type that you are looking to tie
- Select the mandatory absence type that you would like to share your bucket with
- Click on Save
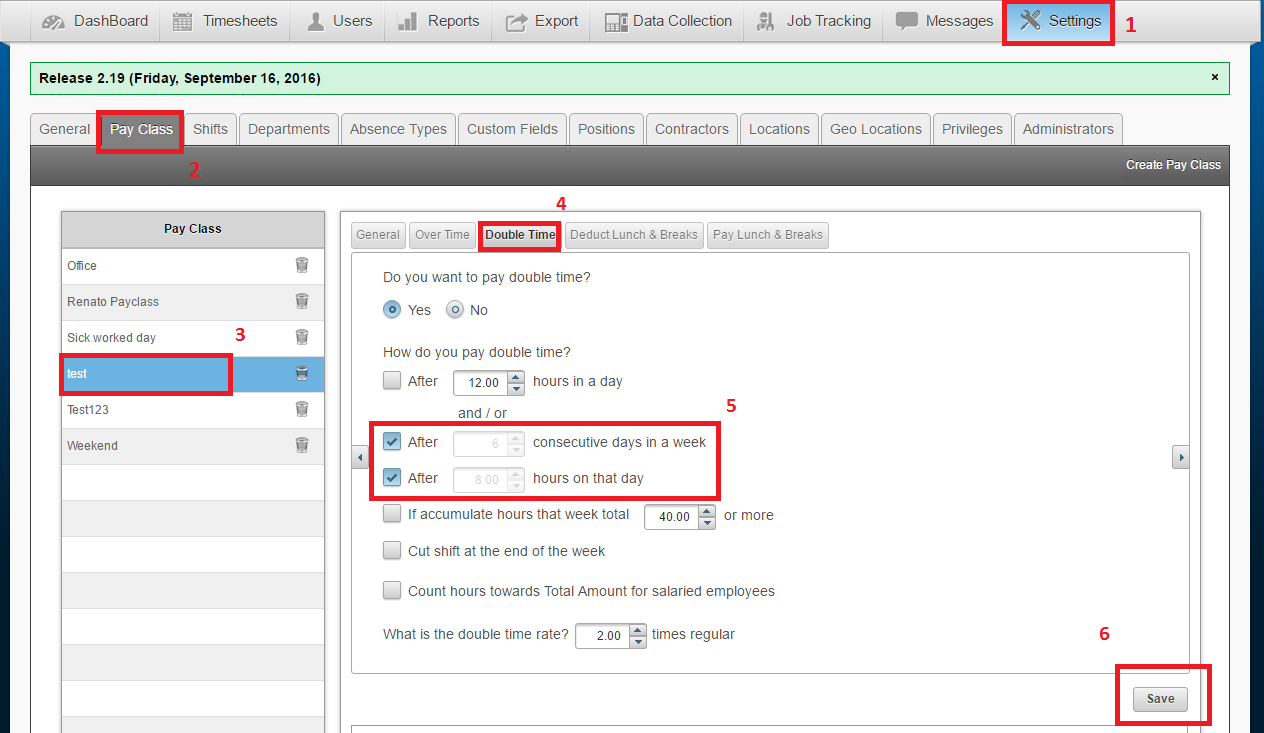
New California Over Time Rule
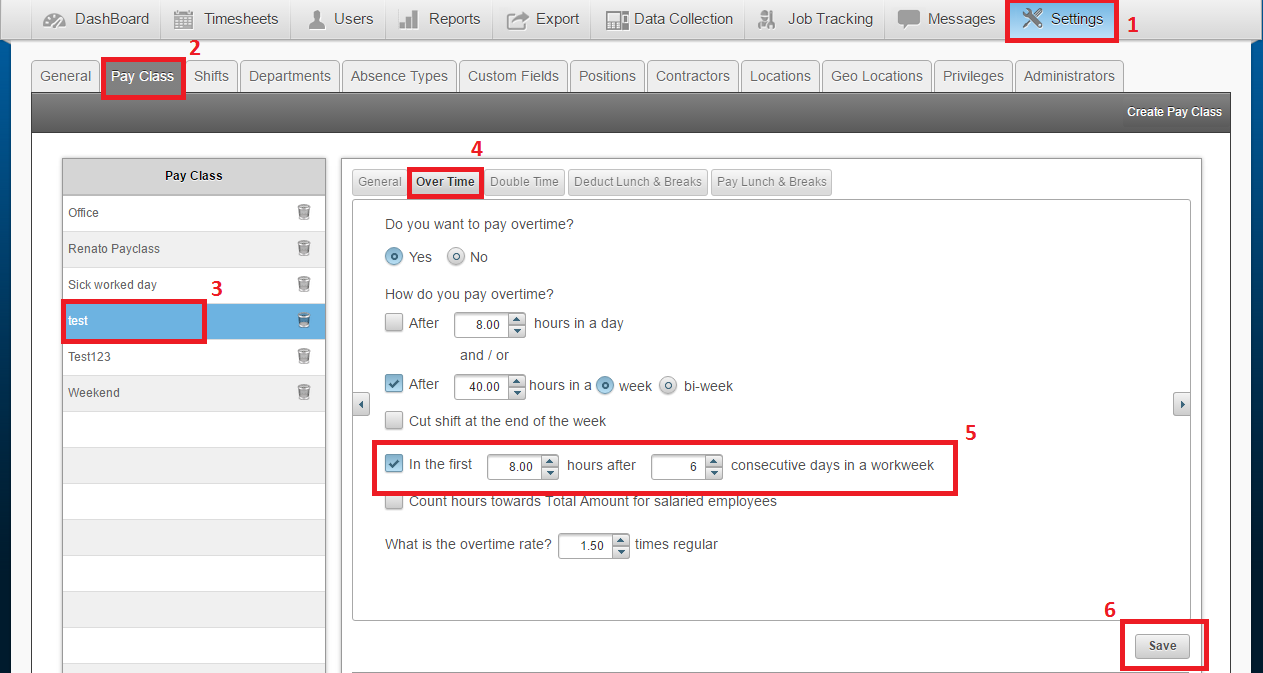
Updates have been made to the Overtime options in the pay class. This update is specifically for California customers to support an Overtime rule that states: after six consecutive days, the employee will get paid Over Time for any hours worked hours on the 7th day. You will also be able to set up a rule that any time after 8 worked hours on the 7th worked day, can be paid as Double Time.
To enable OT for specific amount of hours worked on the 7th day:
- Settings
- Pay Class
- Select the Pay Class you would like to make the adjustment to
- Select option for Over Time rules
- Enable option for amount of hours to be paid as OT
- Click Save
To enable DT after 8 worked hours on the 7th day:
- Settings
- Pay Class
- Select the Pay Class you would like to make the adjustment to
- Select option for Double Time rules
- Enable option for amount of hours to be paid as DT (8 hours by default)
- Click Save