Release 2.13 – Saturday, October 17, 2015
Custom Absences Worked
Now any specified absence type can be considered as regular hours and counting towards overtime.
To enable this setting, navigating to:
1. Settings
2. Absence Types
3. Select Absence Type from list
4. Enable the option to Count hours toward Overtime for the specific Holiday
5. Click Save.
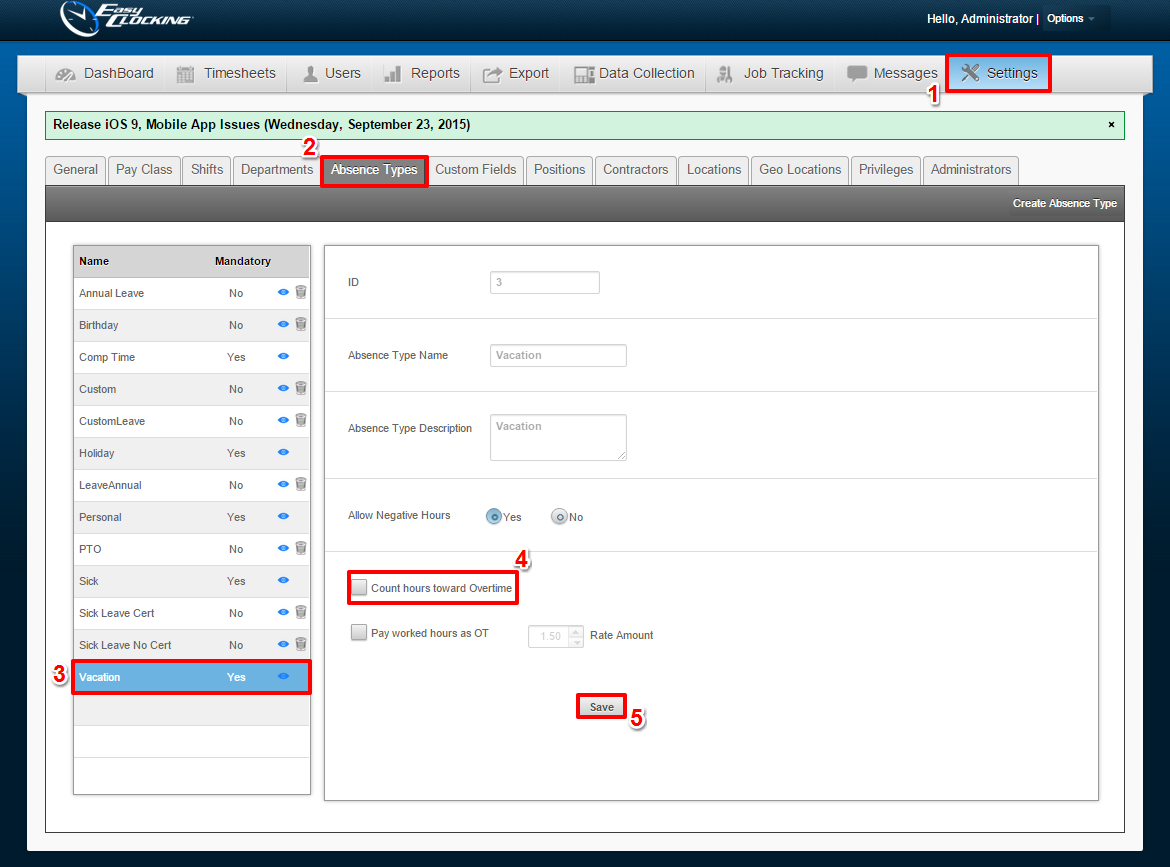
Absence – Pay worked hours as Overtime
If an employee has worked on any given absence, you can now pay the hours worked on that absence as Overtime hours.
1. Settings
2. Absence Types
3. Select Absence Type from list
4. Enable the option to Pay worked hours as Overtime
5. Specify the Rate Amount. Example: 1.50 for Time and a Half.
6. Click Save.

Email Absence Notifications
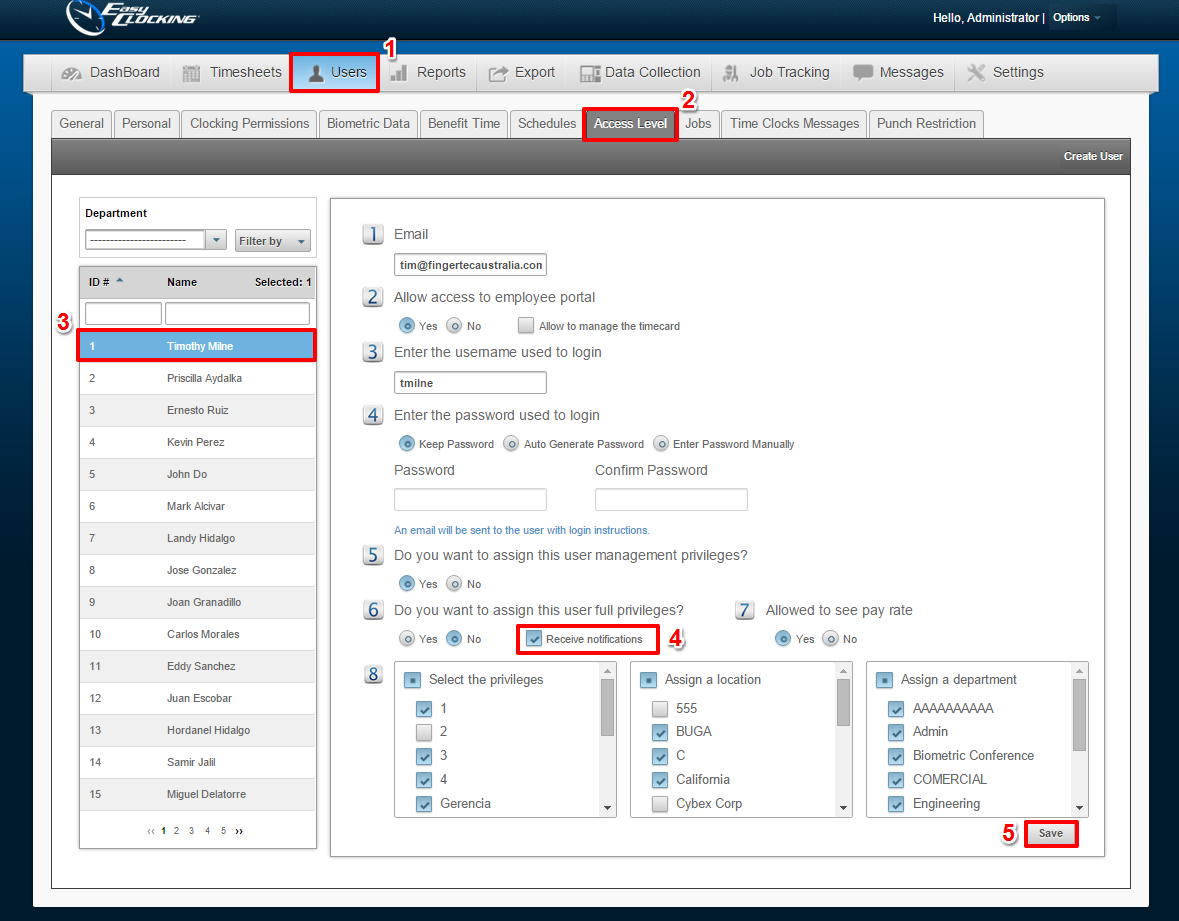
In this new Release, Managers and Administrators will be able to specify whether or not to Receive Emailed Absence Notifications via the Access Level or Administrators tab.
To enable this option via Access Level, navigate to:
1. User
2. Access Level
3. Select the User
4. On Step 6, you can enable or disable Receive Notifications
5. Click Save to apply the changes
To enable this option via the Administrators tab, navigate to:
1. Settings
2. Administrators
3. Select the Administrator
4. On Step 6, you can enable or disable Receive Notifications
5. Click Save to apply the changes
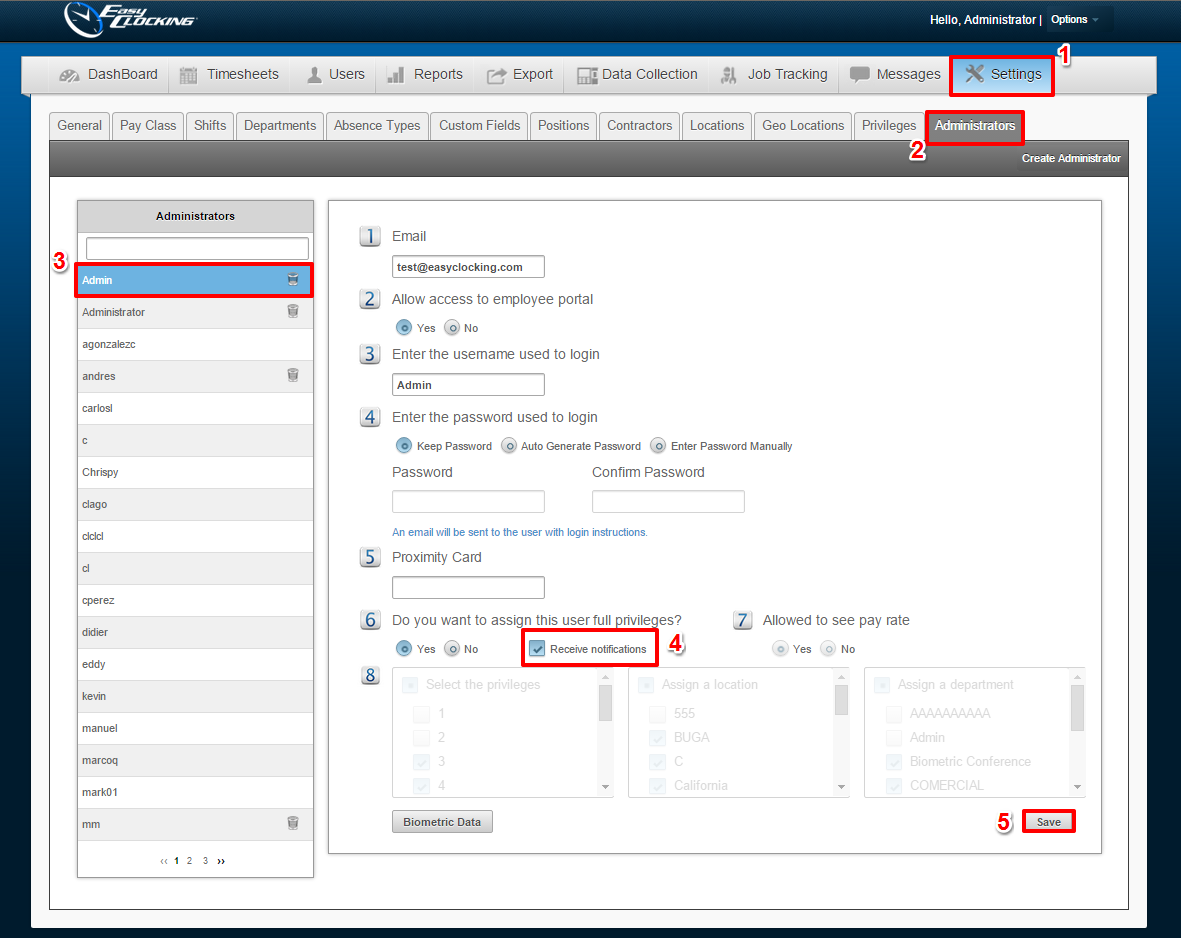
Enabling this option will allow both the specified Administrator/User to receive email notifications for each absence requested and approved/disapproved. You may disable for any one Administrator/User it if you choose to not receive any form of notifications.
Notes on Time Cards
Administrators and Managers will be able to add notes on the Time Card per day, as opposed to per Punch only. This is useful when the employees are using multiple Projects/Job Codes and you would like to include a memo for the task worked on any given day.
You can add a daily note on the time card by navigating to:
1. Dashboard
2. Time Card
3. Located on the right-hand side of the Total column, at the end of the line for any given date, there is a small notepad icon.
4. Click on the icon to input your message
5. To save, click the pencil icon

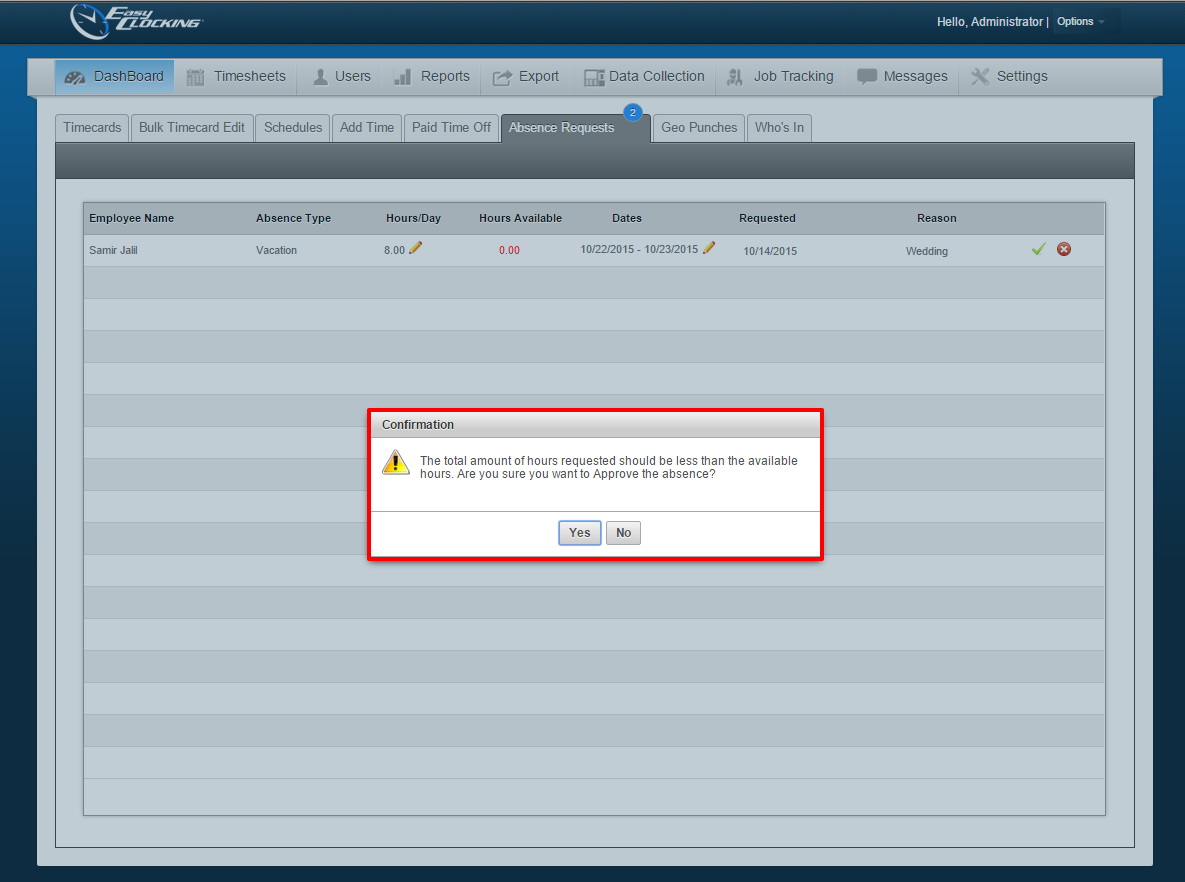
Absence Request Warning
Administrators and Managers will now receive a pop-up warning if they are attempting to approve an absence where the employee is requesting more hours than the amount that they have available.
This notification will appear when navigating to:
1. Dashboard
2. Absence Requests
3. Approving any absence that contains more requested hours than what is available to the employee. (Absences are approved by clicking the green check-mark icon at the end of the absence request line.)
The warning reads:
“The total amount of hours requested should be less than the available hours. Are you sure you want to Approve the absence?”
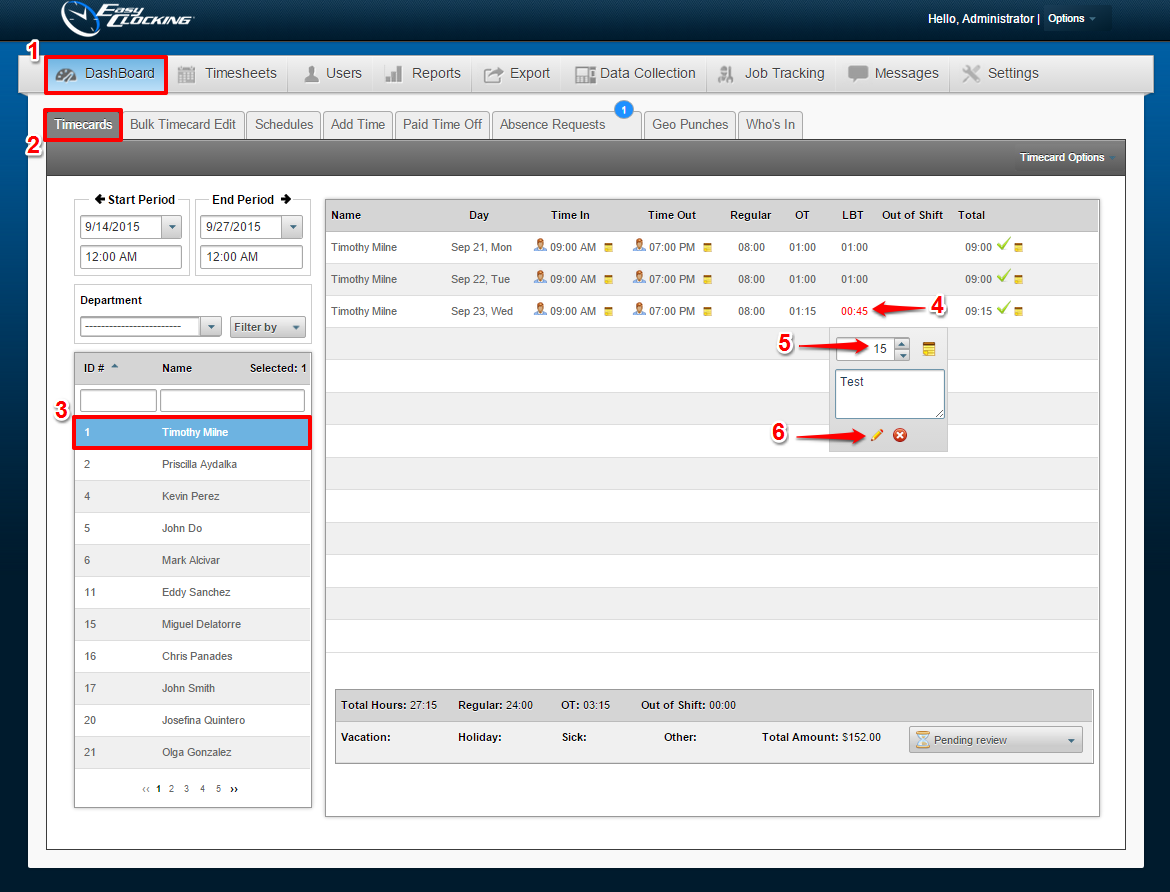
Roll back Lunch on the Time Card
If an Administrator or a Manager wants to have any employee work through their Lunch/Break, they now have the option to override the software’s time card, automatic deduction.
A lunch or break can be manipulated by navigating to:
1. Dashboard
2. Timecards
3. Select the Employee(s)
4. Hover over the lunch deduction; you will then be able to click on it.
5. Enter the amount of time that you would like to give back to the employee.
(Example: A deduction of 1:00 hour – Entering ‘15’ will pay the employee back 00:15 minutes and in turn, deduct only 00:45 minutes for their lunch/break.)
6. Click Save
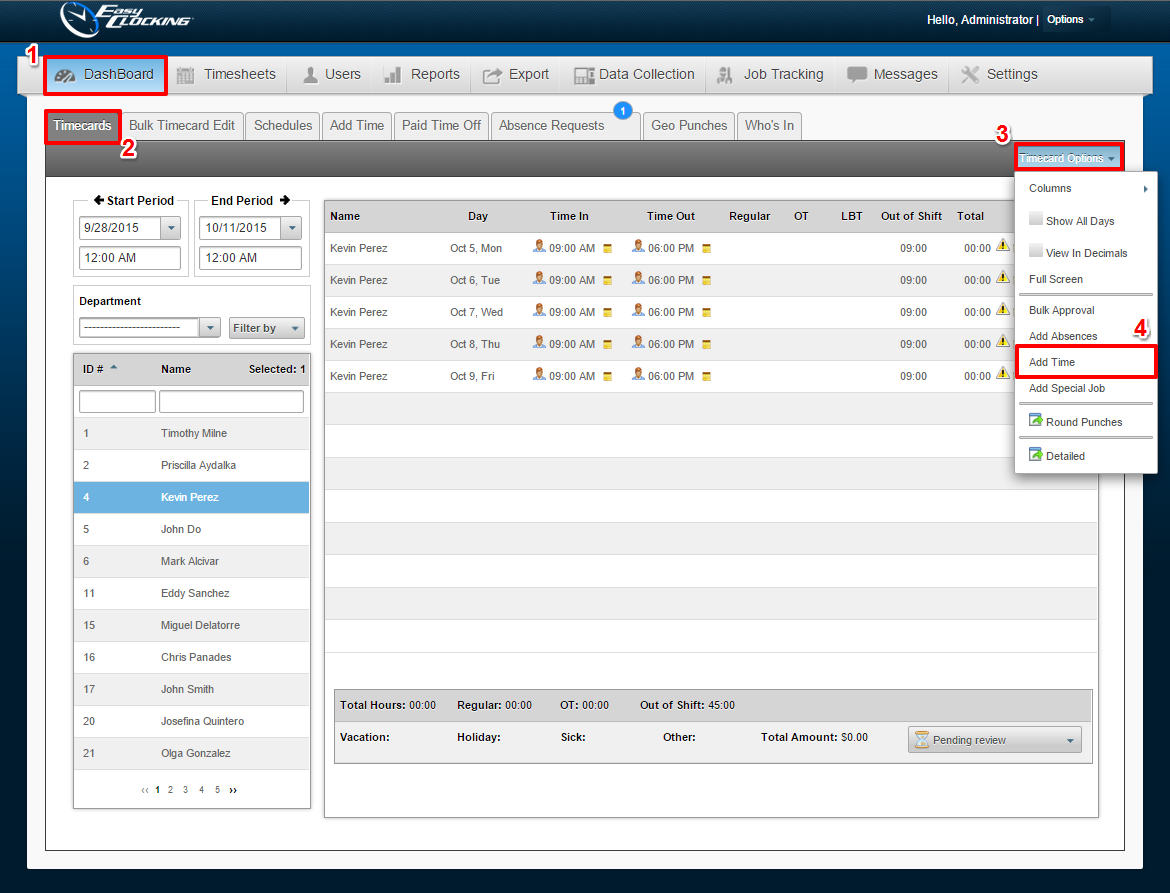
Add Time option on Time Card
Instead of having to navigate to the ‘Add Time’ tab, you can now add time directly from the Time Card Settings.
Navigate to:
1. Dashboard
2. Timecard
3. Follow the timecard tab to the end and select Timecard Settings
4. From the drop-down menu, choose Add Time
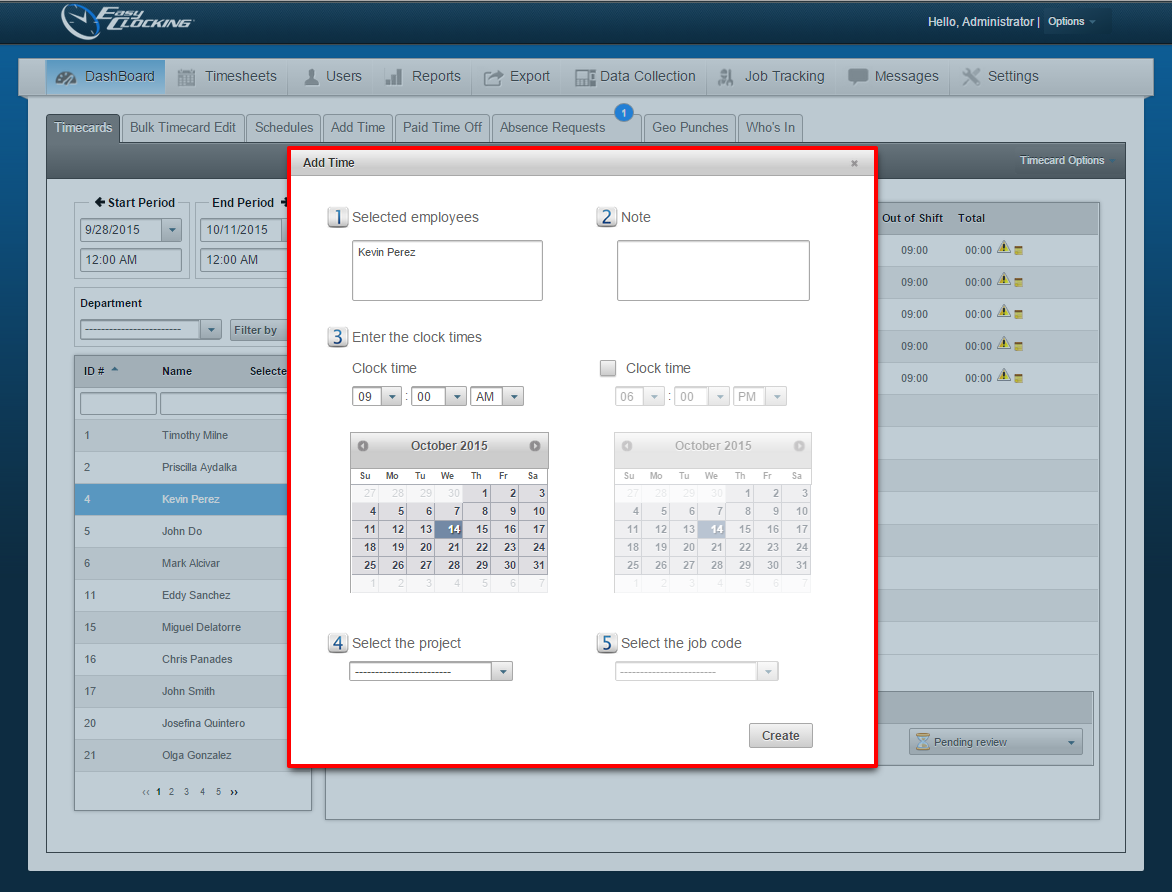
A Window will appear
I. Lists the employee(s) selected
II. Add a Note/Memo for the specific punch/punches you are adding
III. Enter the Clock time(s.) Two slots are available if you need to add and In and an Out punch.
IV. If applicable, select a project that the employee(s) will be working under
V. If and when specifying a project, you may then specify the Job that the employee is clocking under via selecting the corresponding Job Code.
5. Click Create
Search for Shifts
When creating schedules, you can now search through the drop-down menu for previously created shifts.
To search through shifts, navigate to:
1. Dashboard
2. Schedules
3. Select the Employee(s)
4. Follow the Schedule tab to the end and select Schedule Options then click on Create Schedules
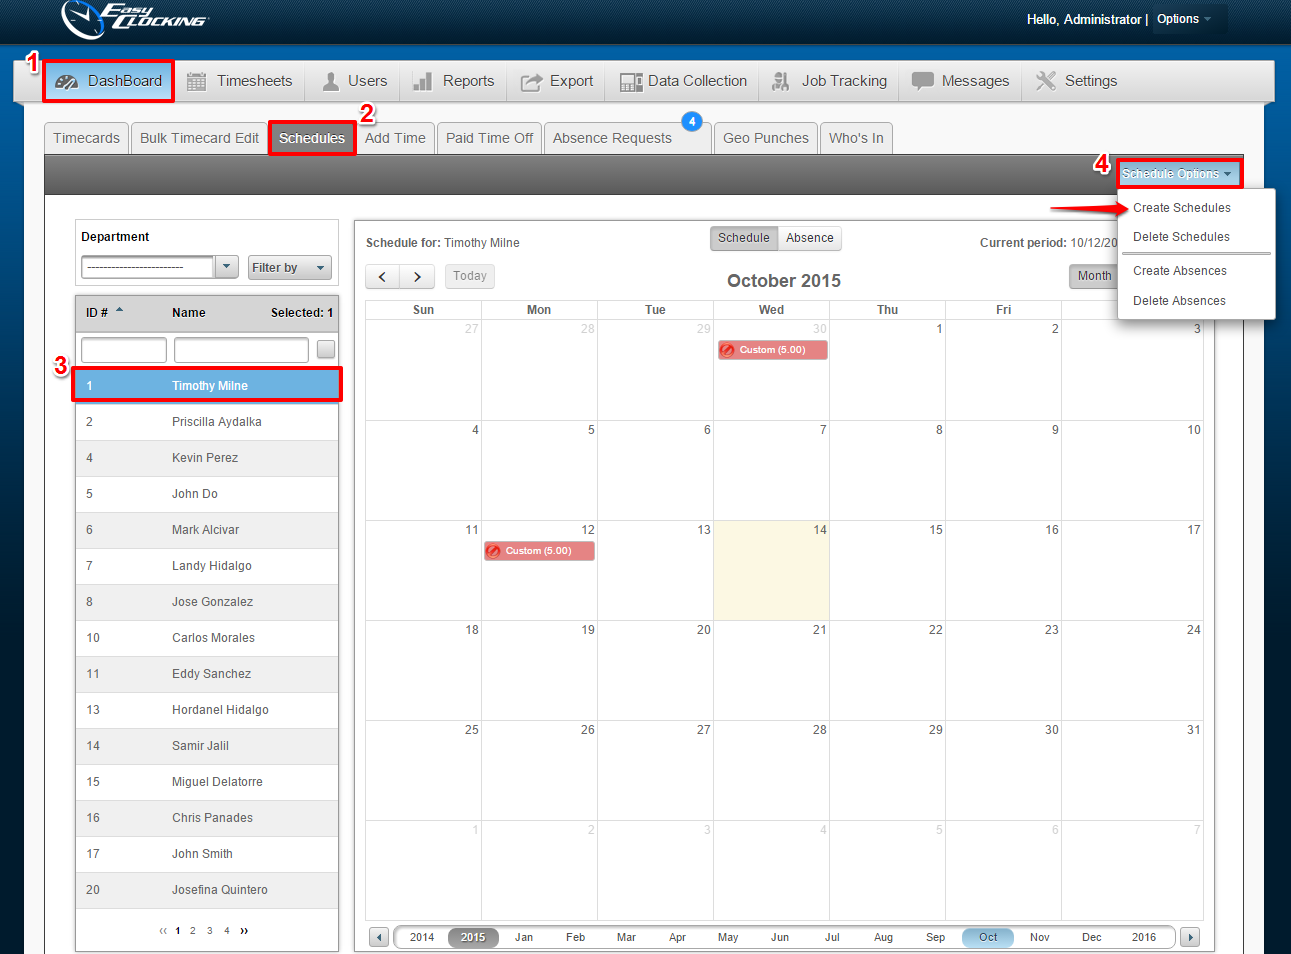
5. In the 2nd step of creating a schedule, you will be prompted to Select the shift for the employee(s.) You will be able to search for the shift by name in the same drop-down box.
6. Complete the process for creating the schedule, and Save to apply all changes.

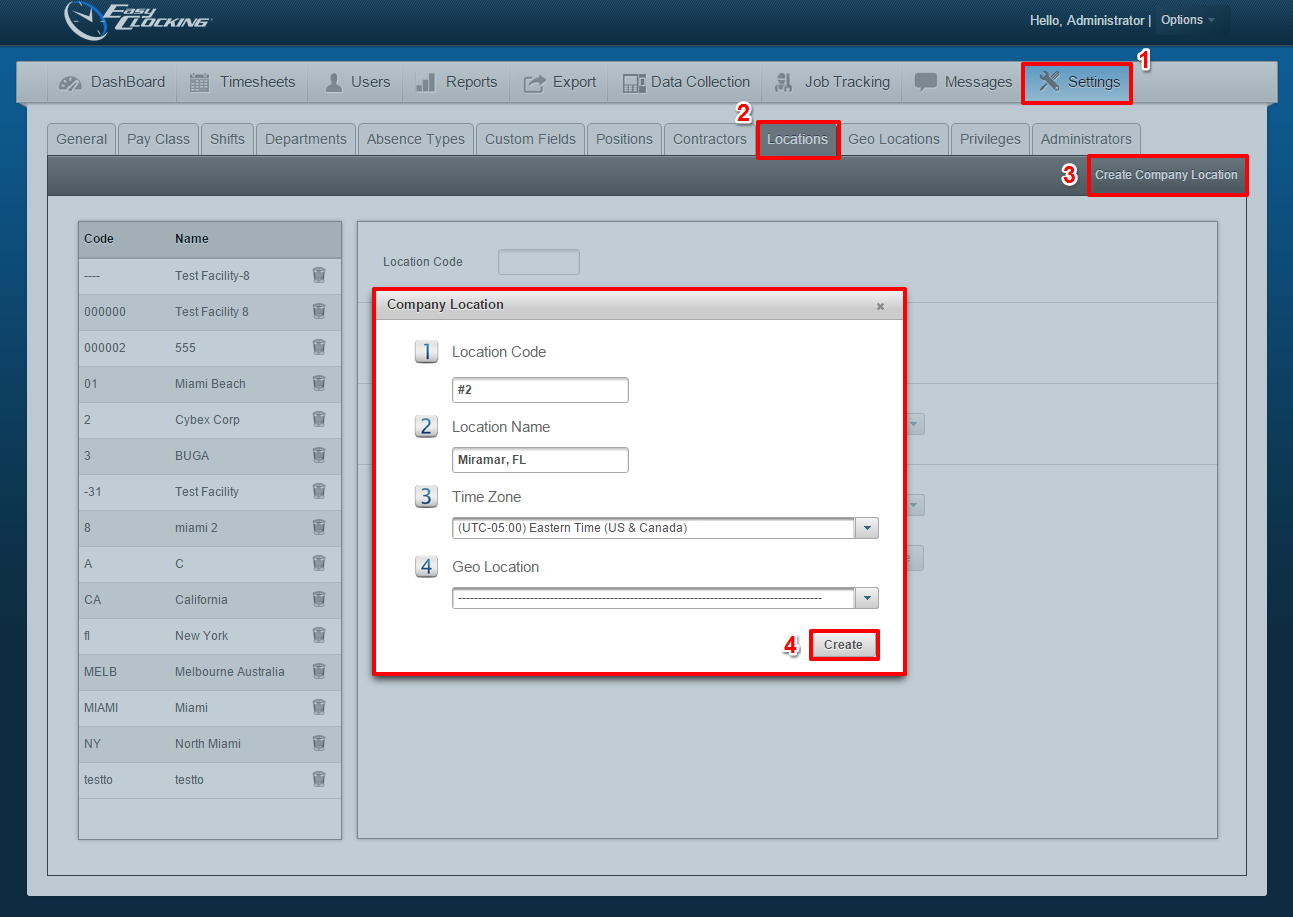
Location Hashtag
Now we accept the Hashtag (#) character for Location codes when creating/adding company Locations via the Software Settings tab.
To add locations navigate to:
1. Settings
2. Locations tab.
3. Click on Create Company Location located on the top right
I. Enter the Location Code
II. Enter the Location Name
III. Select the Time Zone where the clock is being installed
IV. Enter a Geo Location if applicable
4. Click Create
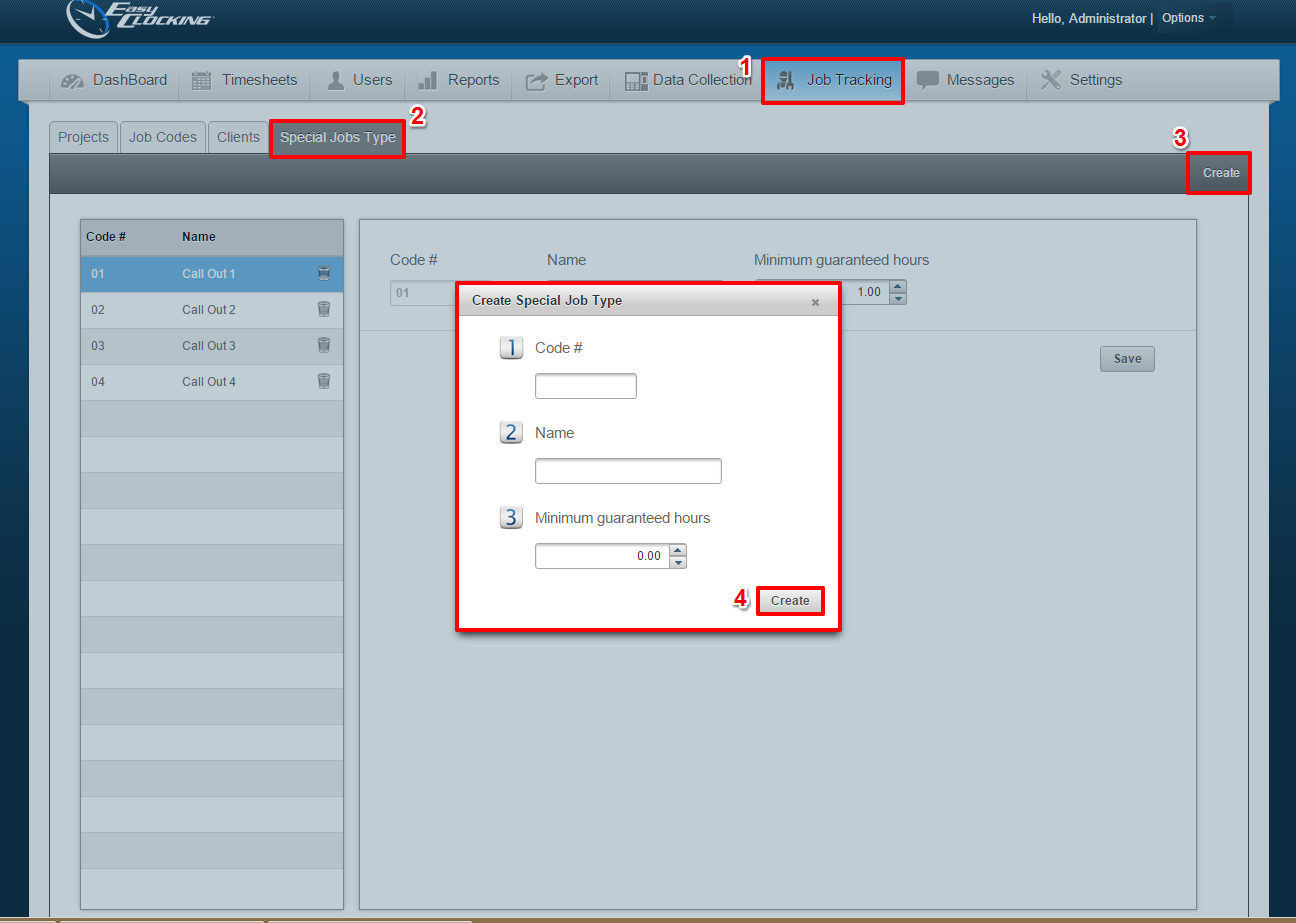
Special Jobs Type
With this new release, an administrator/manager can specify “Special Jobs Type” with guaranteed hours, under Job Tracking. This feature will work well for employees who are “On Call” or are called in at random to work on a day where they are not normally scheduled to work. If the employee works less than the amount of guaranteed hours for any given Special Job Type, the software will round the employees worked hours to the guaranteed amount.
To configure this feature, navigate to:
1. Job Tracking
2. Special Jobs Type
3. Select Create
I. Enter a Code #
II. Enter the Name of the Special Job
III. Enter the amount of Guaranteed hours the employee will be paid for
4. Click Create
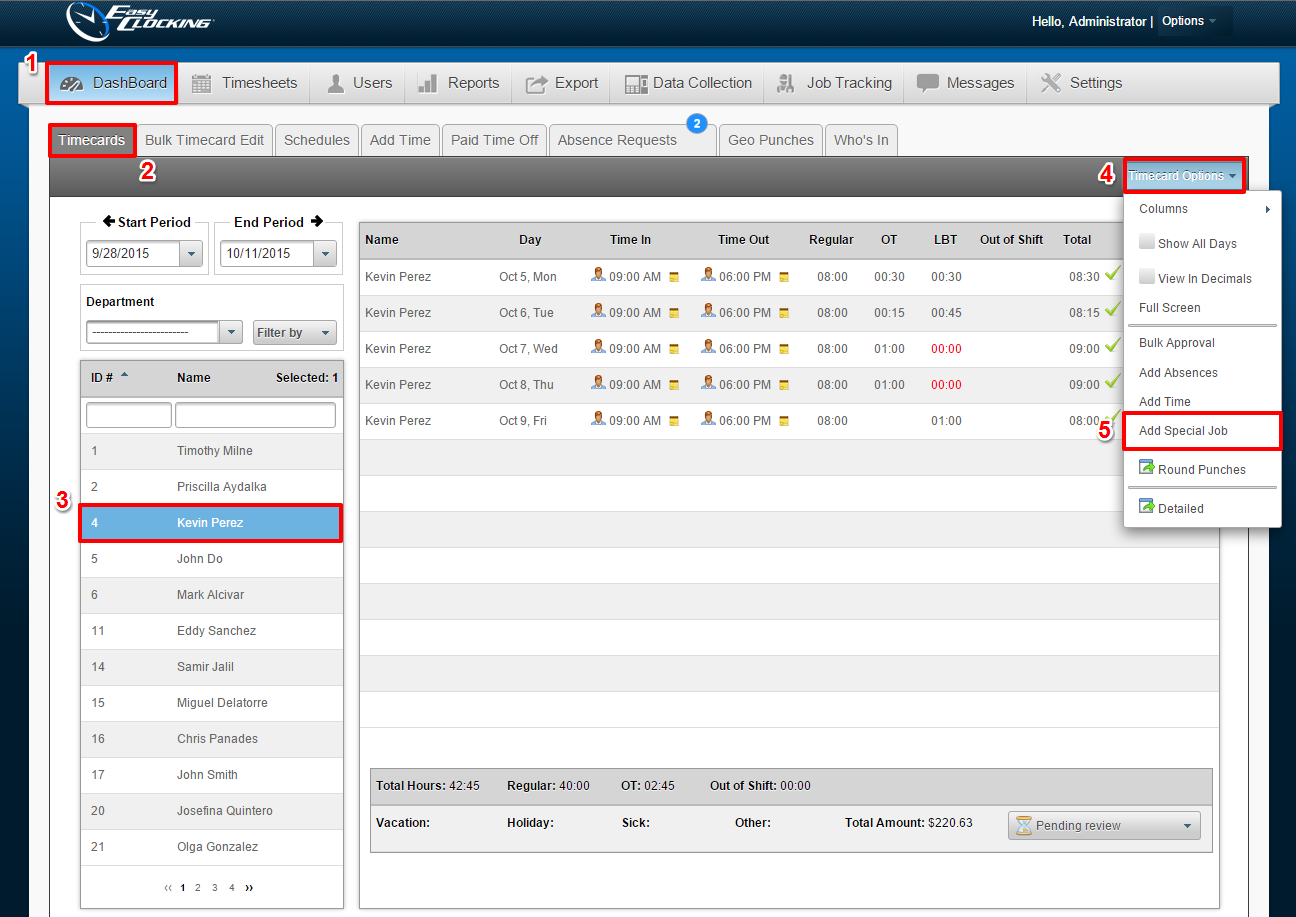
To apply the Special Job, navigate to
- Dashboard
- Timecards
- Select the Employee
- Select Timecard Options to the right of the Timecard tab
- Select Add Special Job
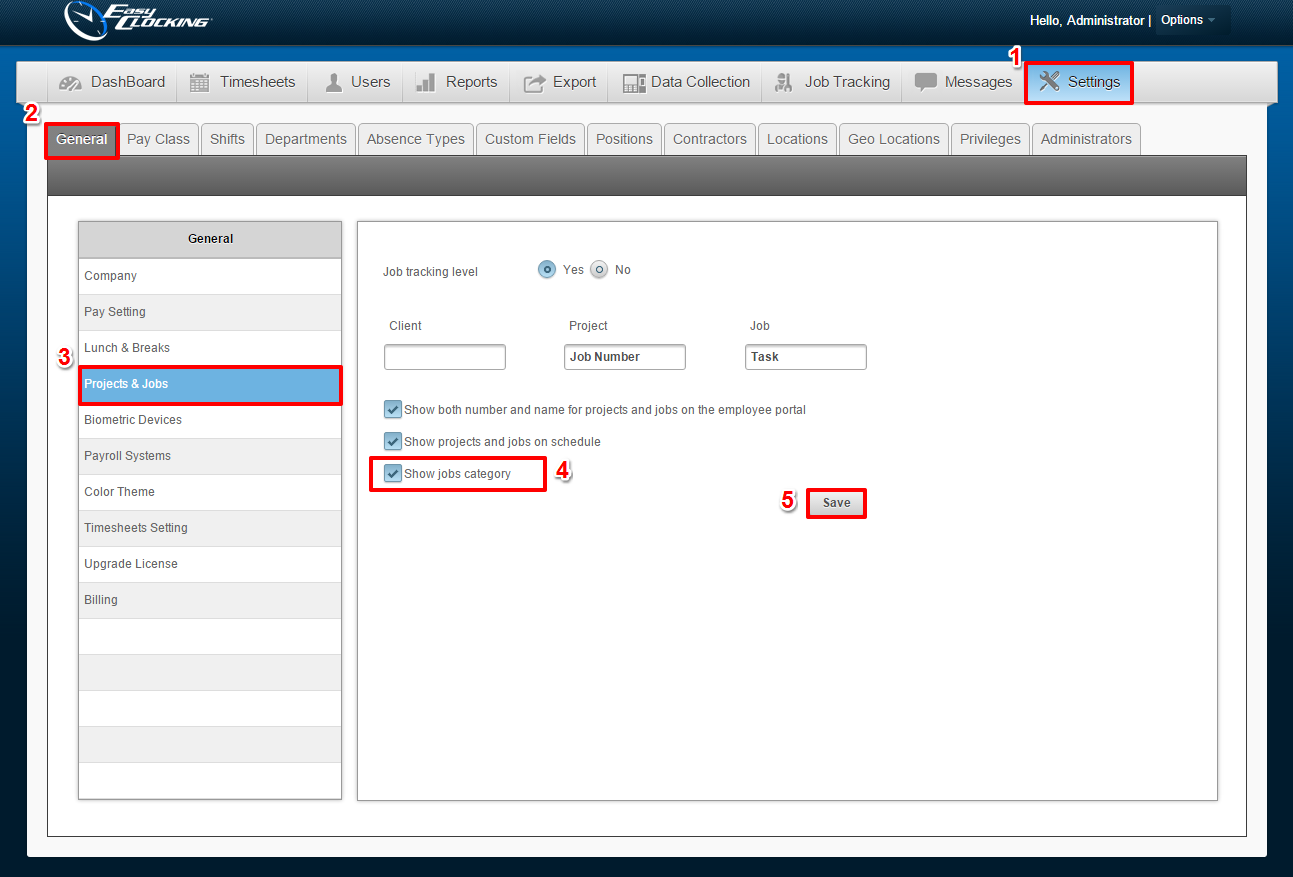
Expense and Capital Job specification
Now you can choose to specify between two Job categories, Expense or Capital, for Job codes.
To enable, navigate to:
1. Settings
2. General
3. Projects & Jobs
4. Enable the option to “Show jobs category”
5. Click Save
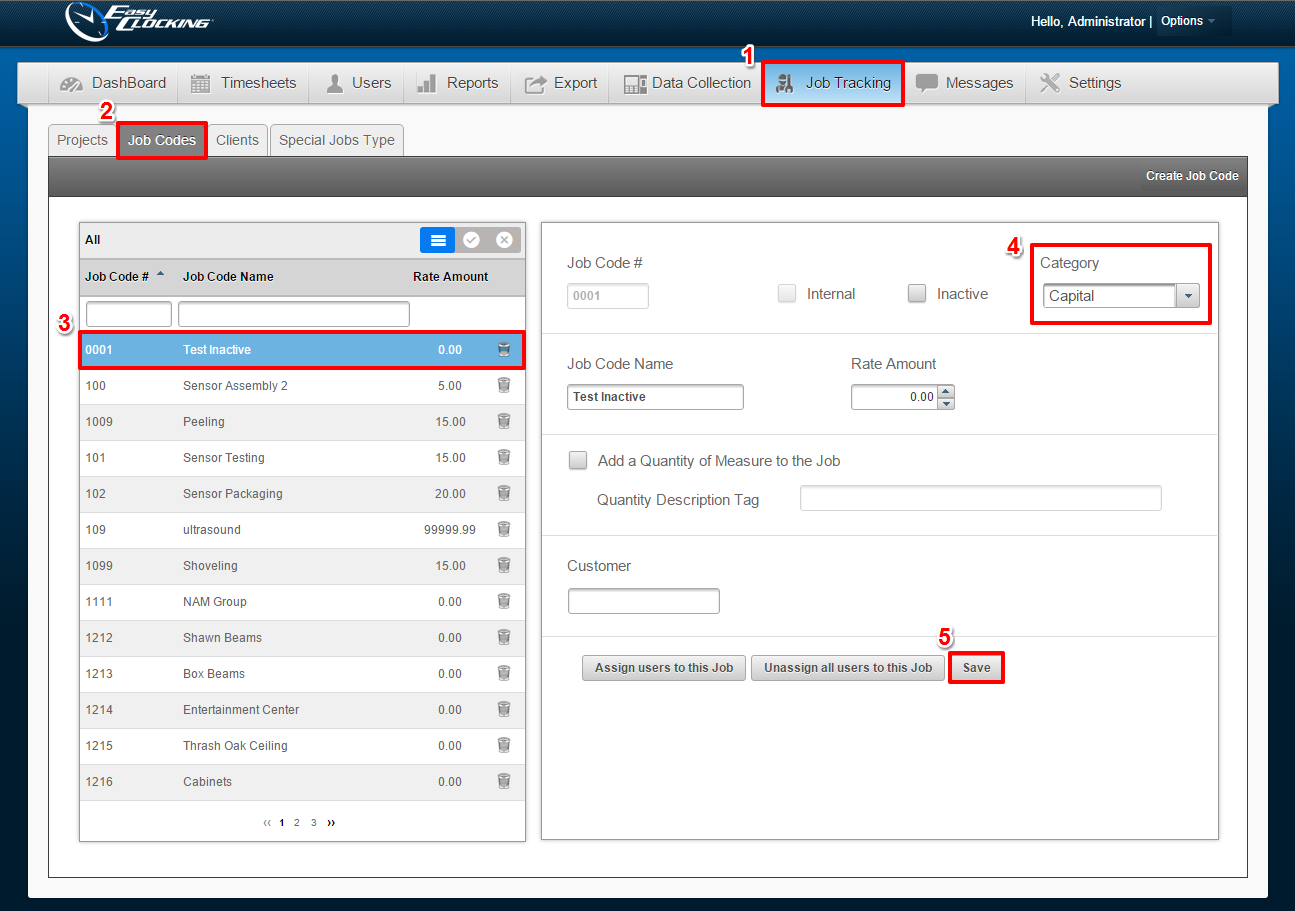
Then, navigate to:
1. Job tracking
2. Job Codes
3. Select a Job Code from the list
4. Specify the category, whether Capital or Expense for the selected Job code.
5. Click Save
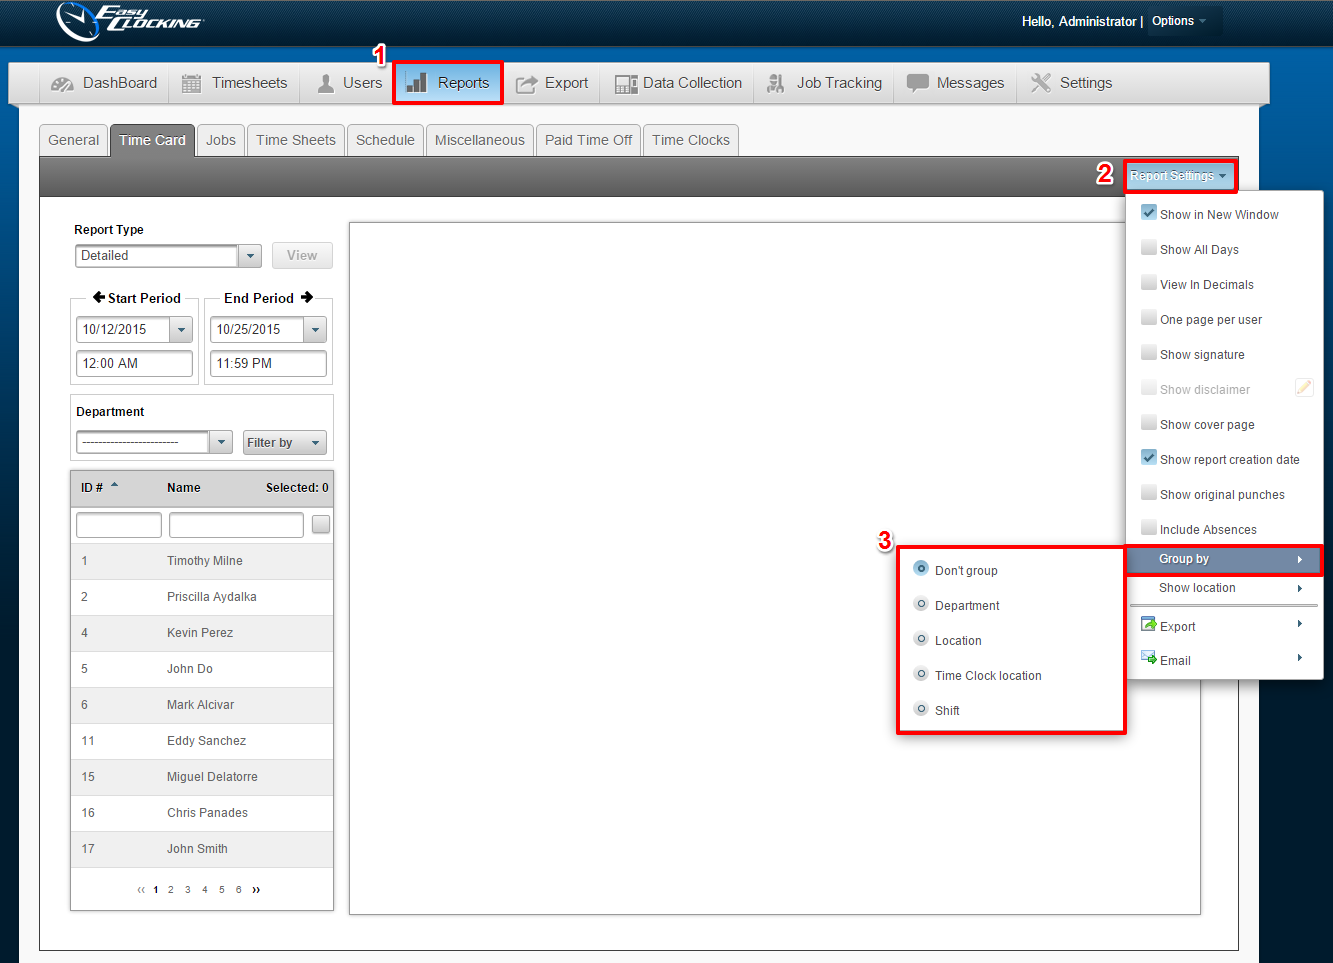
Group by Shift
You can now group report information by employee shifts via the Report Settings. Employees will appear in groups according to the shift worked.
To group by specific information, navigate to:
1. Reports
2. Follow the specific Report-type tab to the end and select Report Settings
3. From the drop-down menu, hover over Group by and choose whether you would like to group by Department, Location, Time clock location or Shift
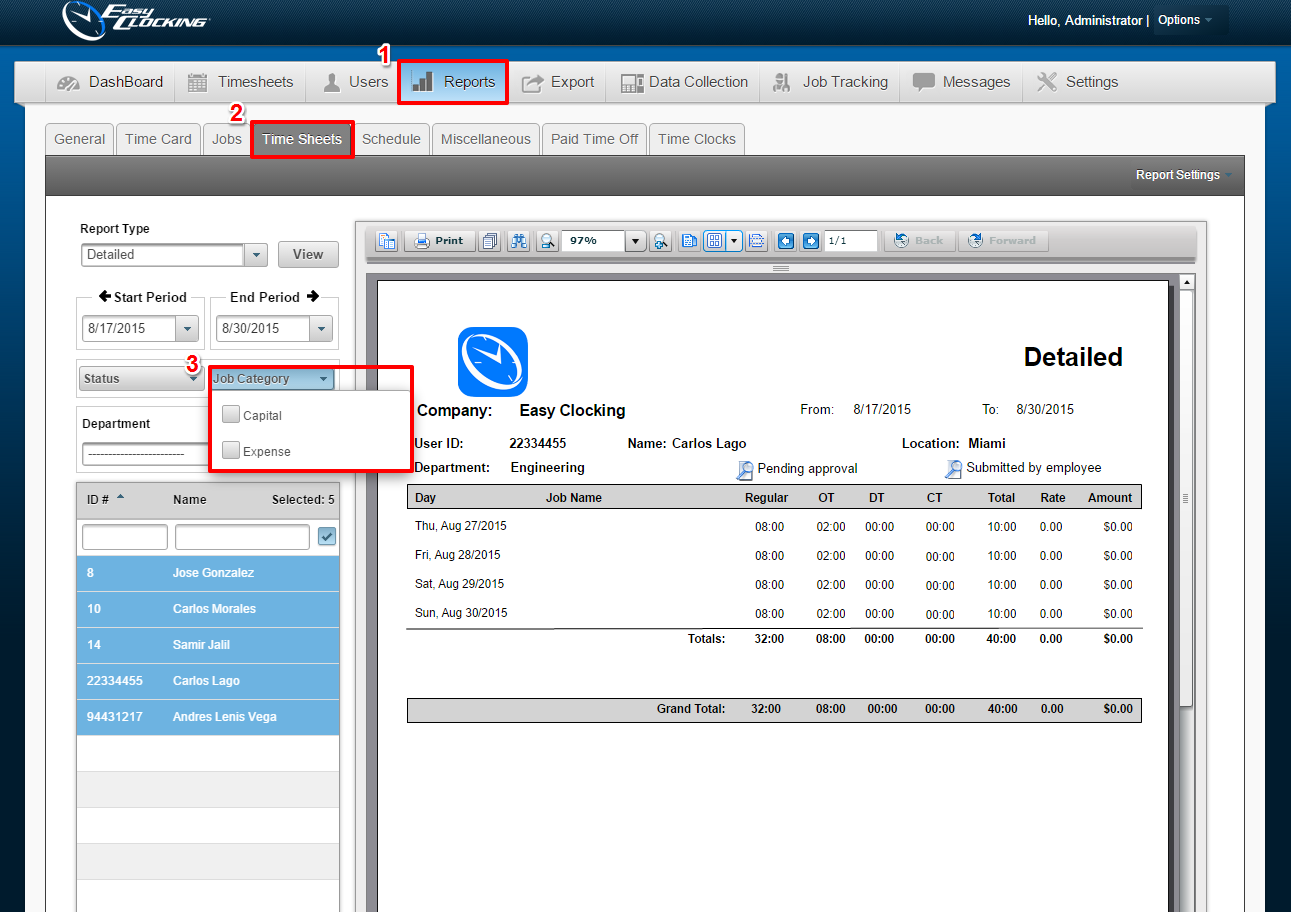
Timesheet Job Category filter
When populating Timesheet reports, a new filter option for “Job Category” is available. You will be able to sort between Capital and Expense.
To sort by Job Category, navigate to:
1. Reports
2. Time Sheets
3. Select the Job Category filter
Click View to populate the Report
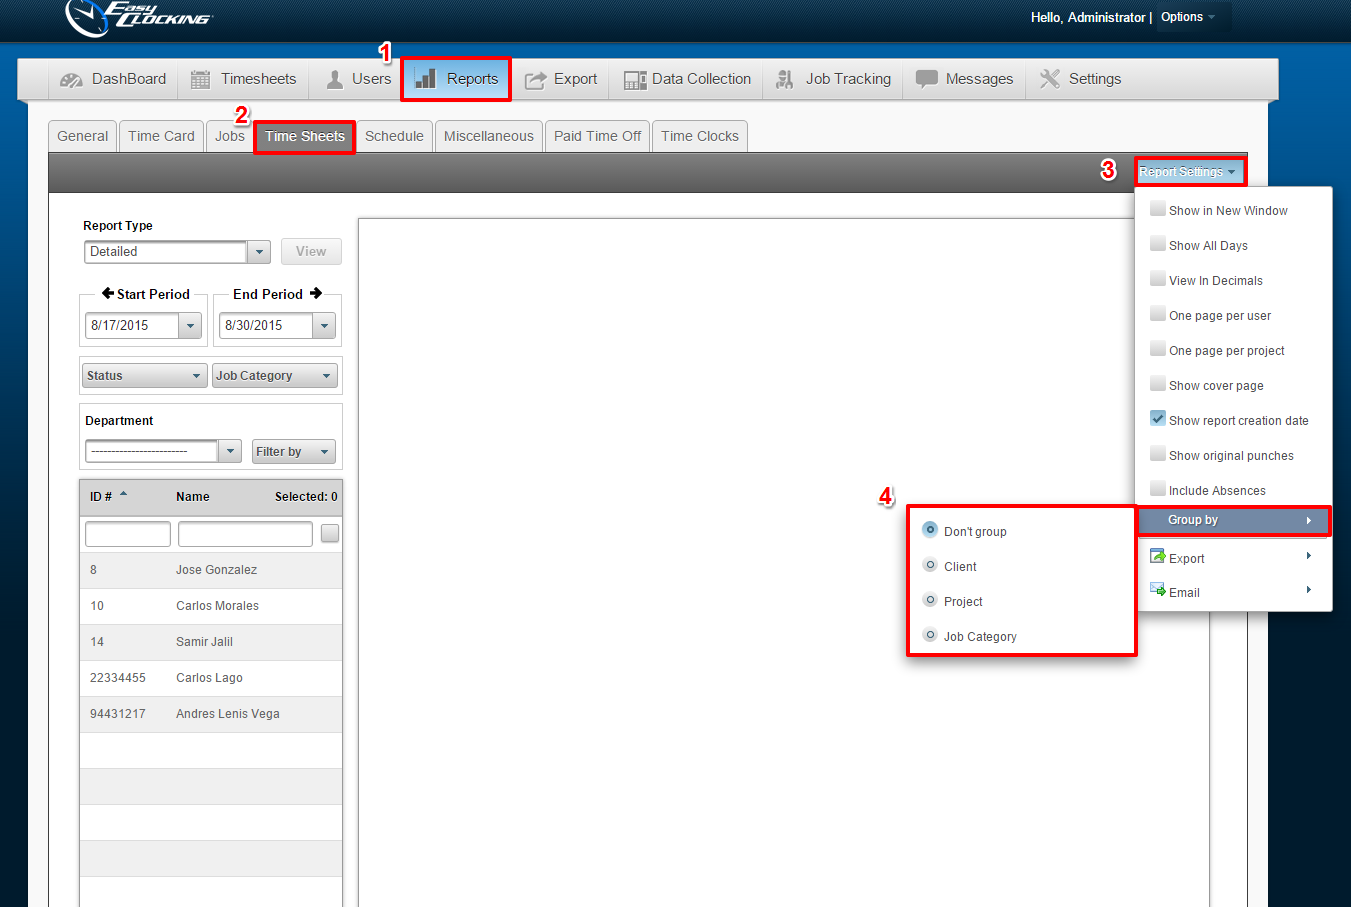
Timesheet Group by
New option is available to Group by Job Category. Employees will be sorted into Expense and Capital Job categories.
To Group by Job Category, navigate to:
1. Reports
2. Time Sheets
3. Select Report Settings
4. Select Group by to specify whether to group by Client, Project, Job Category
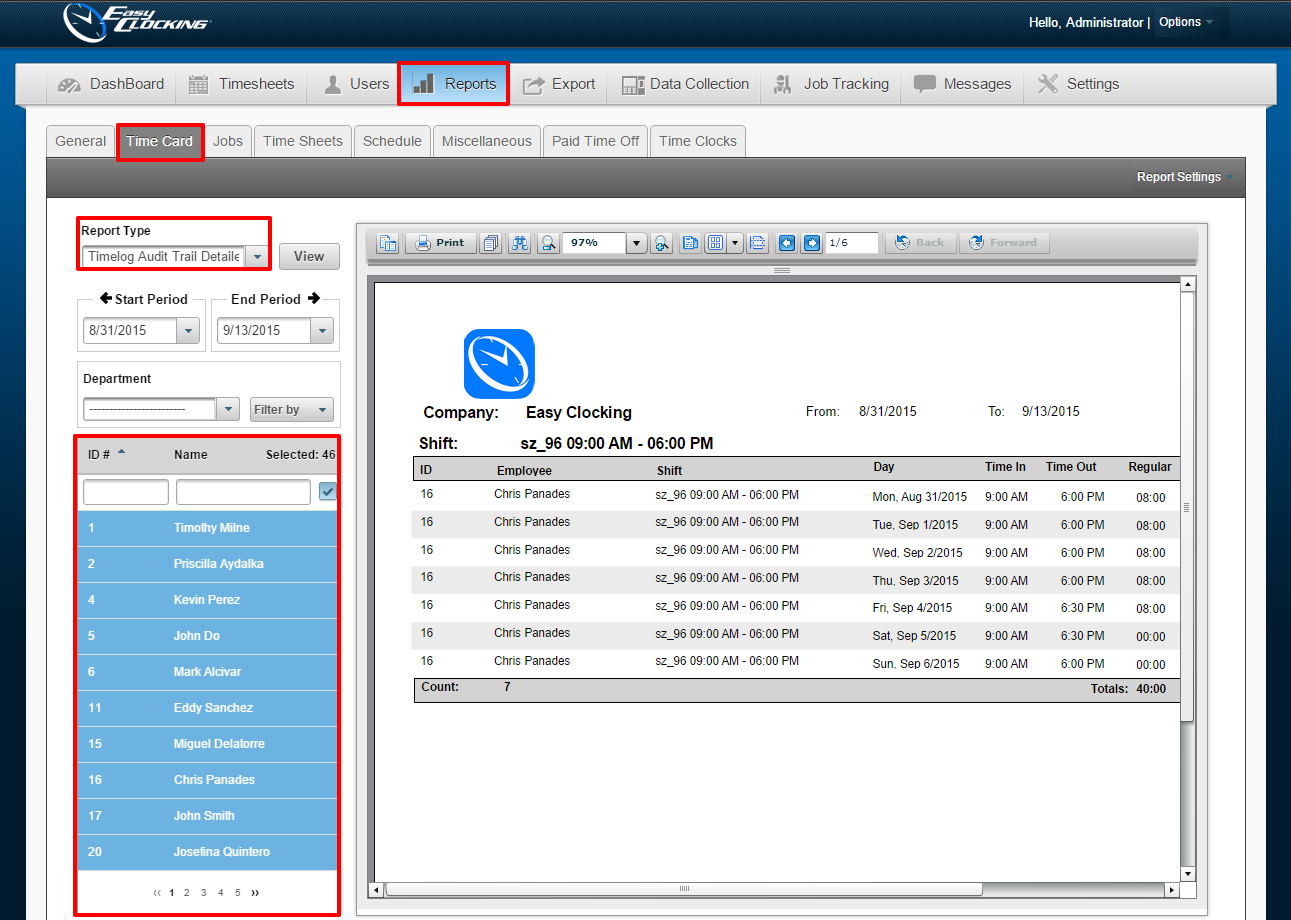
New Timecard report type
Shift Detailed – Detailed report generating the Name of the shift worked, and the time In and Out for that specific shift.
To view a Shift Detailed Report, navigate to:
1. Reports
2. Time Card
3. Select the Report type : Shift Detailed
4. Select the Employee(s)
Click View to generate the report.

Time audit trail detailed – Generates a report displaying the specific times that have been edited by different administrators/managers. Displays what admin/manager made which changes.
To view a Time audit trail detailed report, navigate to:
1. Reports
2. Time Card
3. Select the Report type : Time audit trail detailed
4. Select the Employee(s)
Click View to generate the report.