
Dashboard: Manual Time Entry/Changes
Overview
There are three ways of adding time in Easy Clocking software. One way is in the Timecard Dashboard from a missing punch, the second way is in the Add Time tab, and the third option is to Add Time through the Time Card Settings directly on the Time Card.
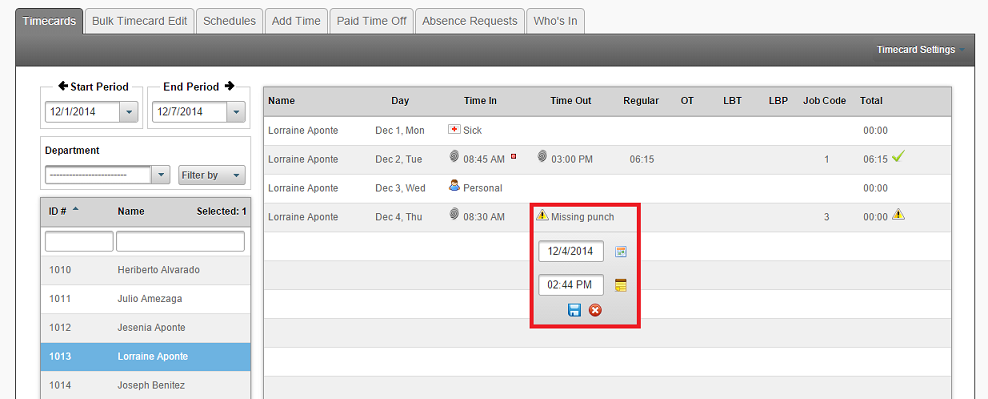
To add time from a missing punch, do the following:
- Click on Dashboard, then click on the Timecards.
- Click one or more Users from the list to view their time logs (To select more than one user, hold the Ctrl key as you click all the users you wish to select).
- For the days missing time logs, a
 notification will be displayed.
 - Click on the
 icon next to missing punch, then enter the time, and click on the icon
  to save.
 - Time added manually by an Administrator will have this icon
 next to the time log.
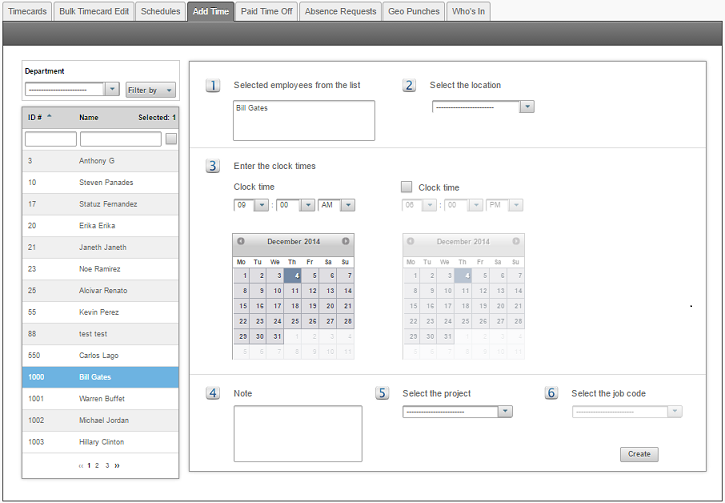
To add time logs for one or multiple users and/or days (from the Add Time tab):
- Click on Dashboard then click on the Add Time tab.
- Select one or more employees from the list (To select more than one user, hold the Ctrl key as you click all the users you wish to select).
- Enter the clock times. You could add up to two record for the same or different dates at once.
- Enter a Job Code if this criteria applies to these logs.
- Enter a note to track why these records were added.
- To finish, click Create.
Add Time Directly from Time Card Options
Instead of having to navigate to the ‘Add Time’ tab, you can now add time directly from the Time Card Options. Navigate to:
- Dashboard
- Timecard
- Follow the timecard tab to the end and select Timecard Options
- From the drop-down menu, choose Add Time
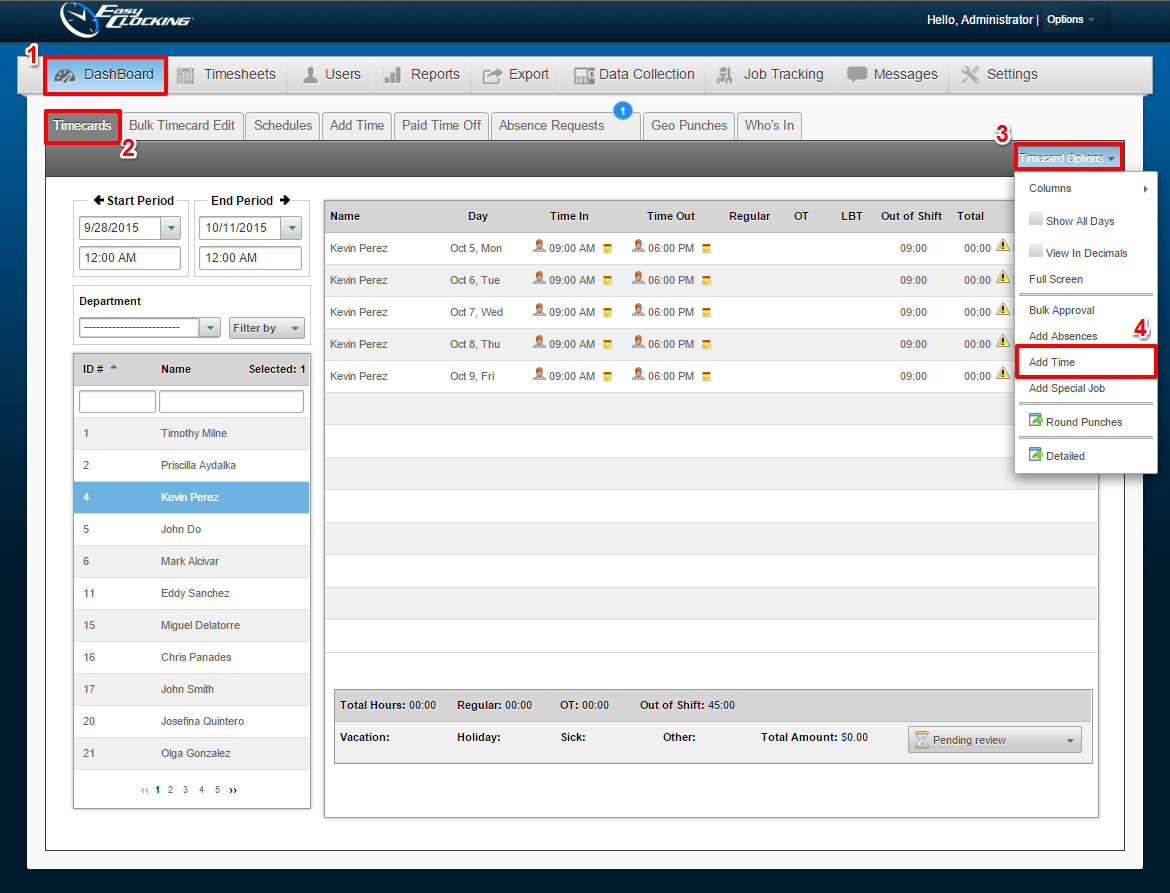
A Window will appear
- Lists the employee(s) selected
- Add a Note/Memo for the specific punch/punches you are adding
- Enter the Clock time(s.) Two slots are available if you need to add and In and an Out punch.
- If applicable, select a project that the employee(s) will be working under
- If and when specifying a project, you may then specify the Job that the employee is clocking under via selecting the corresponding Job Code.
5. Click Create
