Timecards: Pay Period Selection
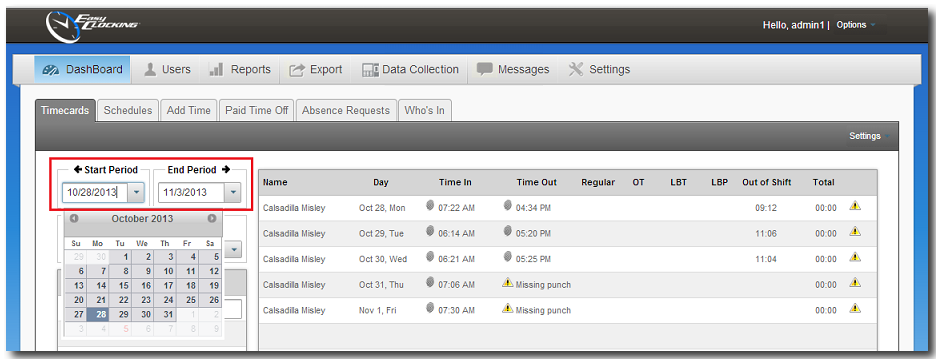
To monitor time and attendance information in Easy Clocking, you can set your pay period start and end dates for reporting as per your company needs. You can select as many days as needed. However, the system can also predetermine the period based on the settings you have entered (These settings can be found under Settings > General > Pay Settings).
You could manually select the date range; by slecting the start and end dates. Also, it could be predefined by weekly, bi-weekly, monthly and semi-monthly pay period types. After defining your pay period type, every instance the application is opened, the current pay period will be displayed.
At a glance: If a company pay period selection is monthly, when they open the software it will always show the dates from the first to the last day of the current month, but if they need to run a report from the 15th of October to the 15th of November, then you can change the start and end dates for the period as you wish.
How to manually select the period:
You can do this all throughout the application. For example, In the Dashboard time card, Reports section, Export section, and anywhere you can enter the start and end dates as shown below.
To select custom periods, select the drop down. The calendar will display and then choose the desired dates. Clicking the ![]() left arrow will shift to the last predefined pay-period and clicking on the
left arrow will shift to the last predefined pay-period and clicking on the ![]() right arrow will shift to the next predefined pay-period.
right arrow will shift to the next predefined pay-period.
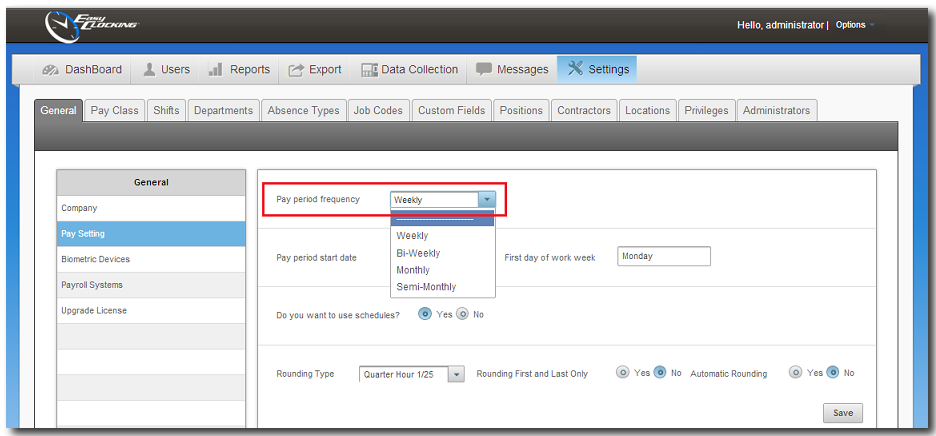
How to define pay-periods in the company settings.
- Select Settings then General.
- Within General click on Pay Settings.
- Under Pay Period Frequency select one of the following pay-periods.
- Weekly.- Used for companies that process payroll every week, every seven days.
- Bi-Weekly.- User for companies that process payroll every other week, every 14 days.
- Monthly.- Used for companies that process payroll once a month.
- Semi-Monthly.- Used for companies that process payroll twice a month, on the 15th and on the last day of every month.
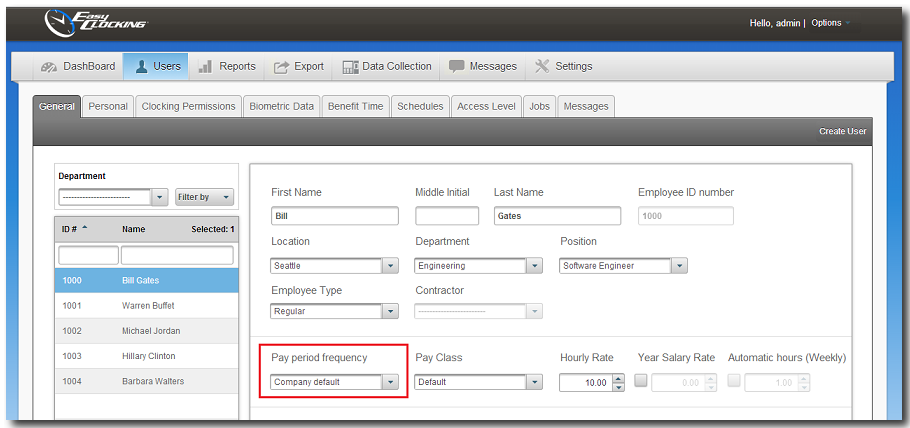
Note: The pay-period selection described above is a global setting that will apply to all employee profiles registered in the software. This is the company default pay-period. If there is an employee that will use a different pay-period other than the company default, you could adjust this setting for each employee profile following the instructions on the next paragraph.
How to define a different pay period for an employee profile other than the Company Default.
- Select Users.
- Select the General tab.
- Select the employee in reference from the list.
- Under Pay Period Frequency, company default should be currently selected.
- Select the desired pay period type from the drop down and then select Save.