
 EC 20 Setup
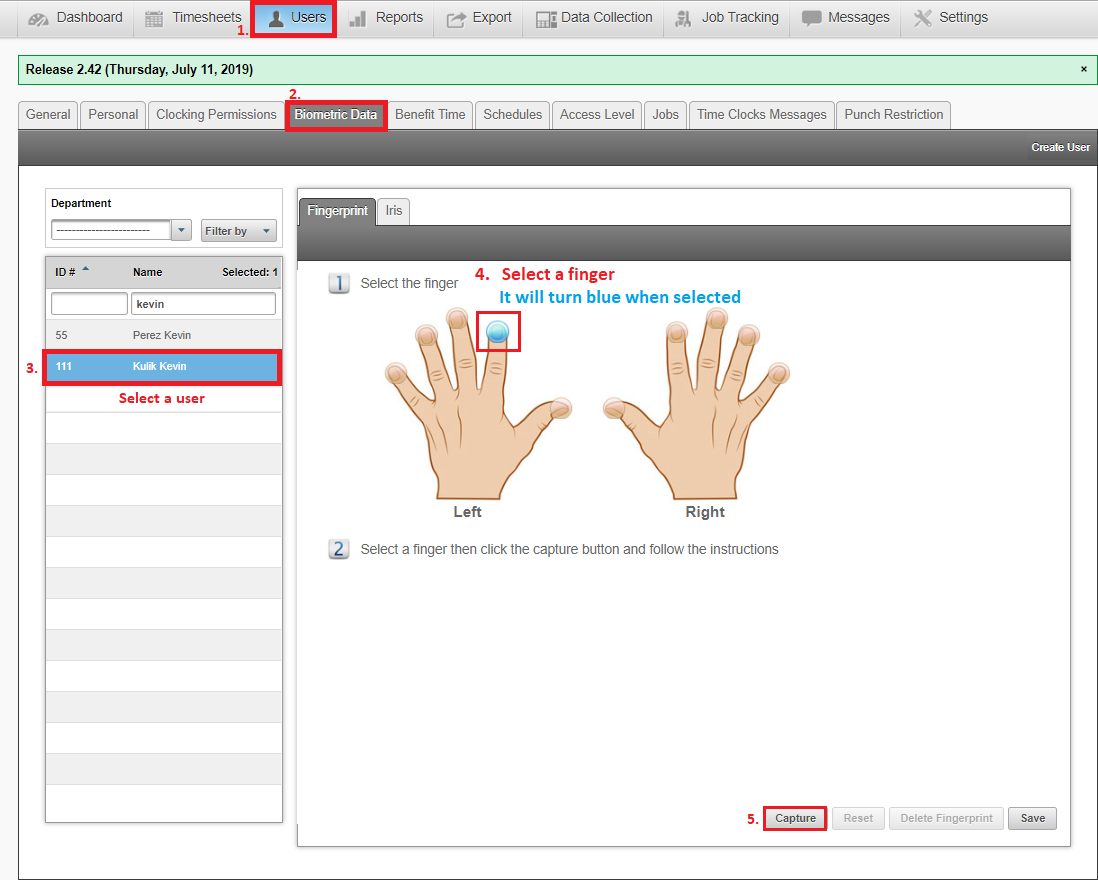
1. Select “Easy Clocking” in the Default USB Scanner list

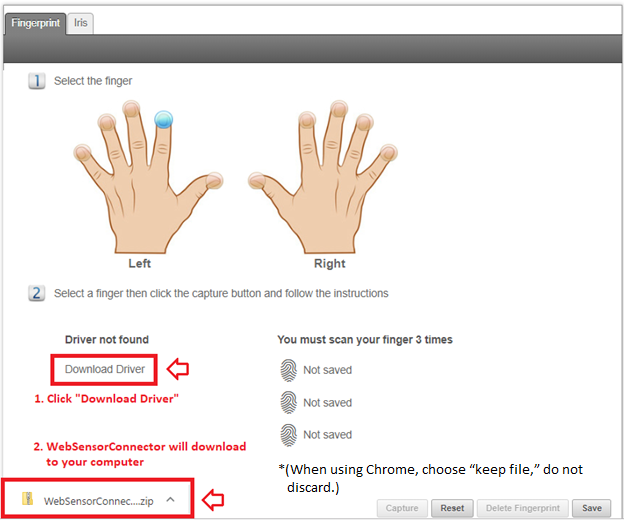
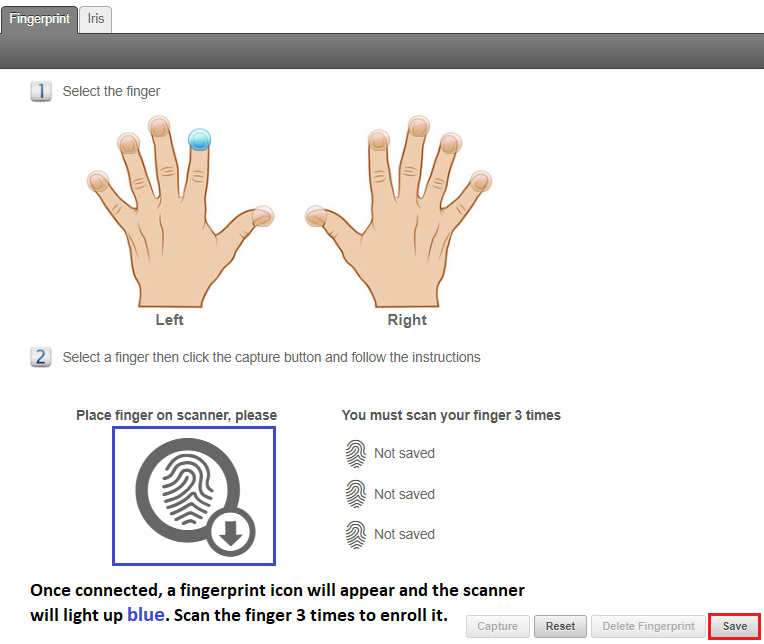
2. Select a fingerprint and click “Capture”
3. Download the driver to your computer
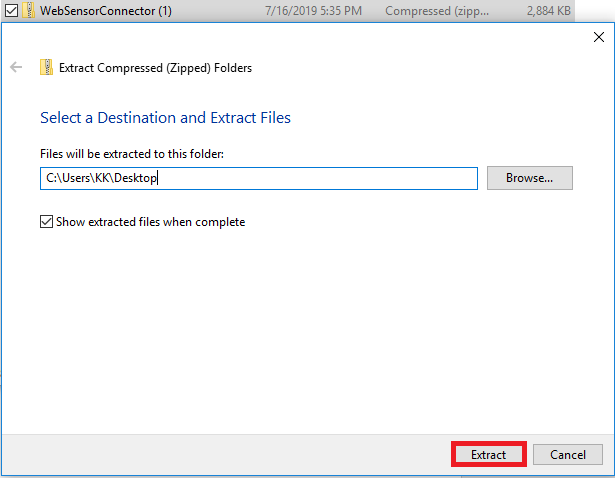
4. Extract WebSensorConnector to a location on your computer
5. Run WebSensorConnector as an administrator

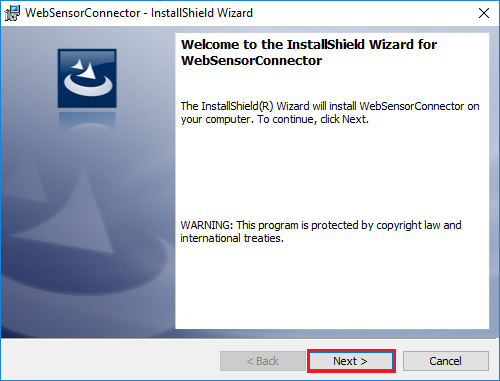
6. Click Next
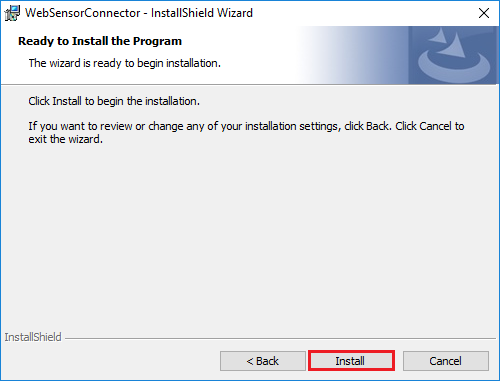
7. Click Install
8. Click Finish

9. Go back to the software and click “Capture”. Make sure the EC 20 USB Scanner is plugged in to the computer.

10. The EC 20 Scanner should now connect successfully and be ready for use.
EC 20 Fingerprint Scanner still not working? See below.
1. Restart your computer
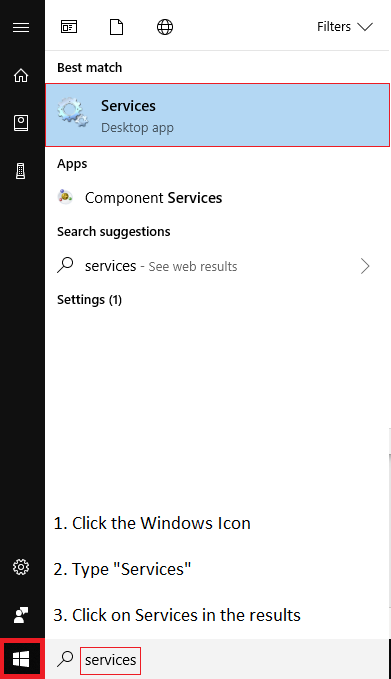
2. Check for WebSensorConnector in the Services and Start/Restart it

Once the Service is restarted/started, try to enroll a fingerprint.
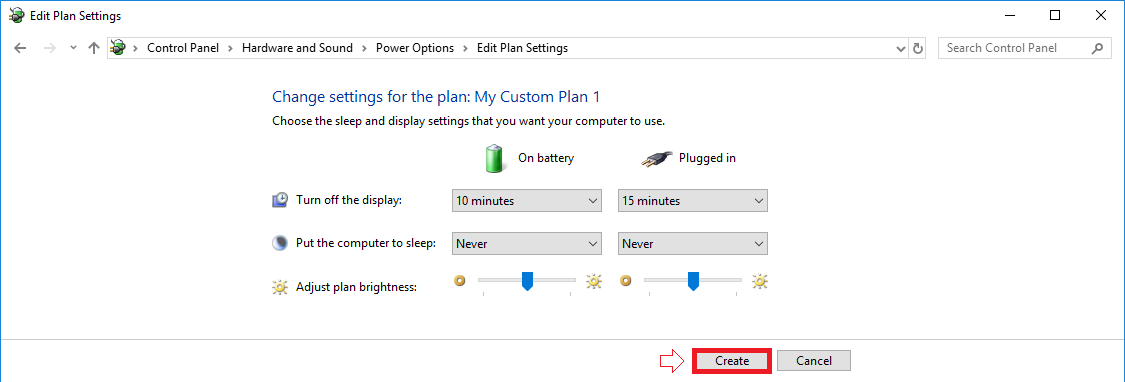
3. For laptops, set the power plan to “High Performance”


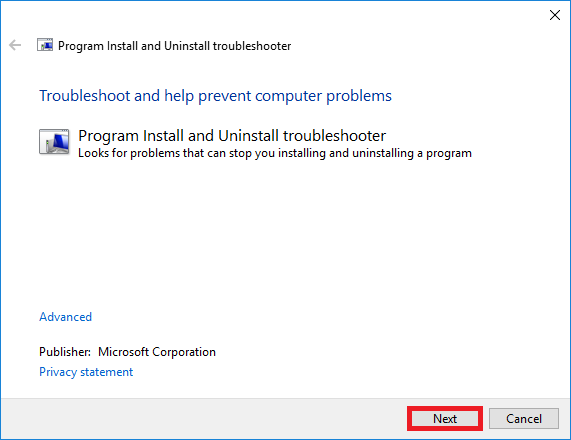
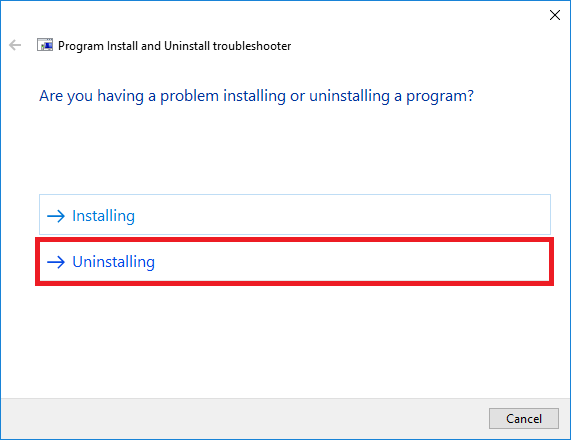
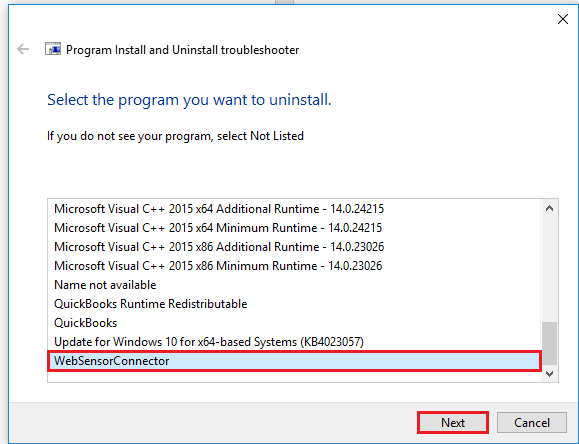
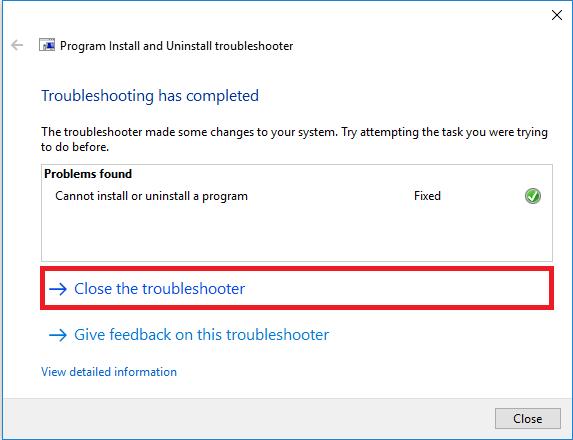
4. Download and run this program Program_Install_and_Uninstall to uninstall the driver. Make sure the correct USB Reader settings have been selected in the software and re-install.
 << Double click to run

| If you have any questions please let us know.Email: support@easyclocking.com
Phone: 1-888-783-1493 |