
 Xenio 20 Setup


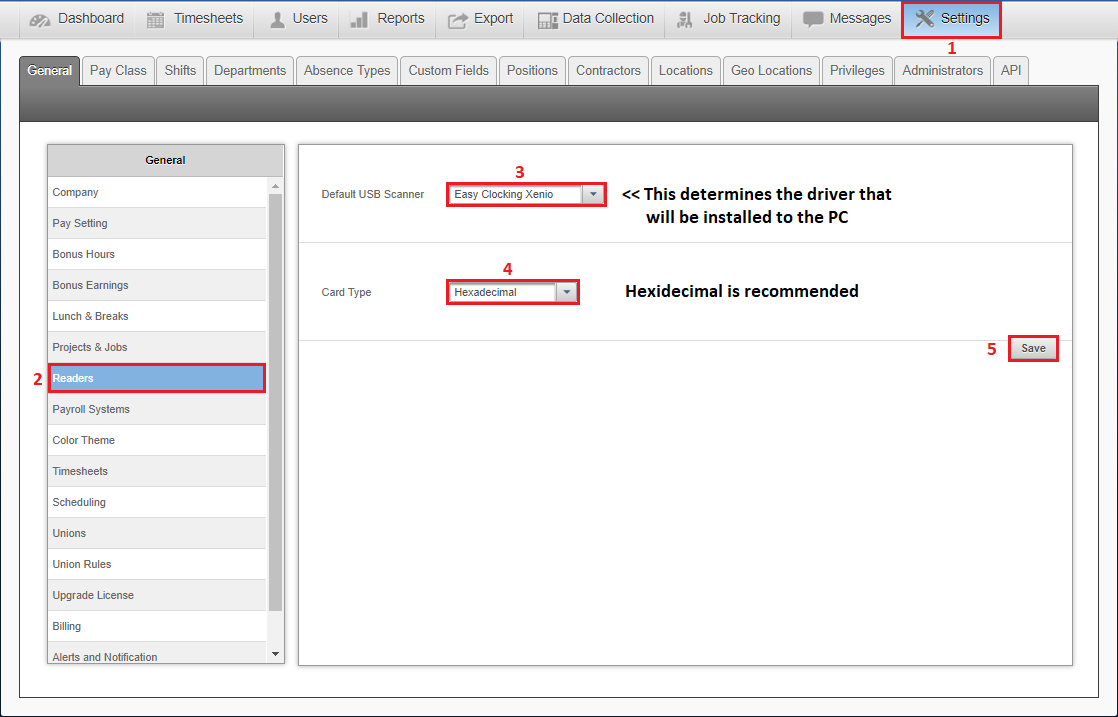
1. Log in to EasyClocking.net as an Administrator.
2. Select “Easy Clocking Xenio” as the Default USB Scanner.
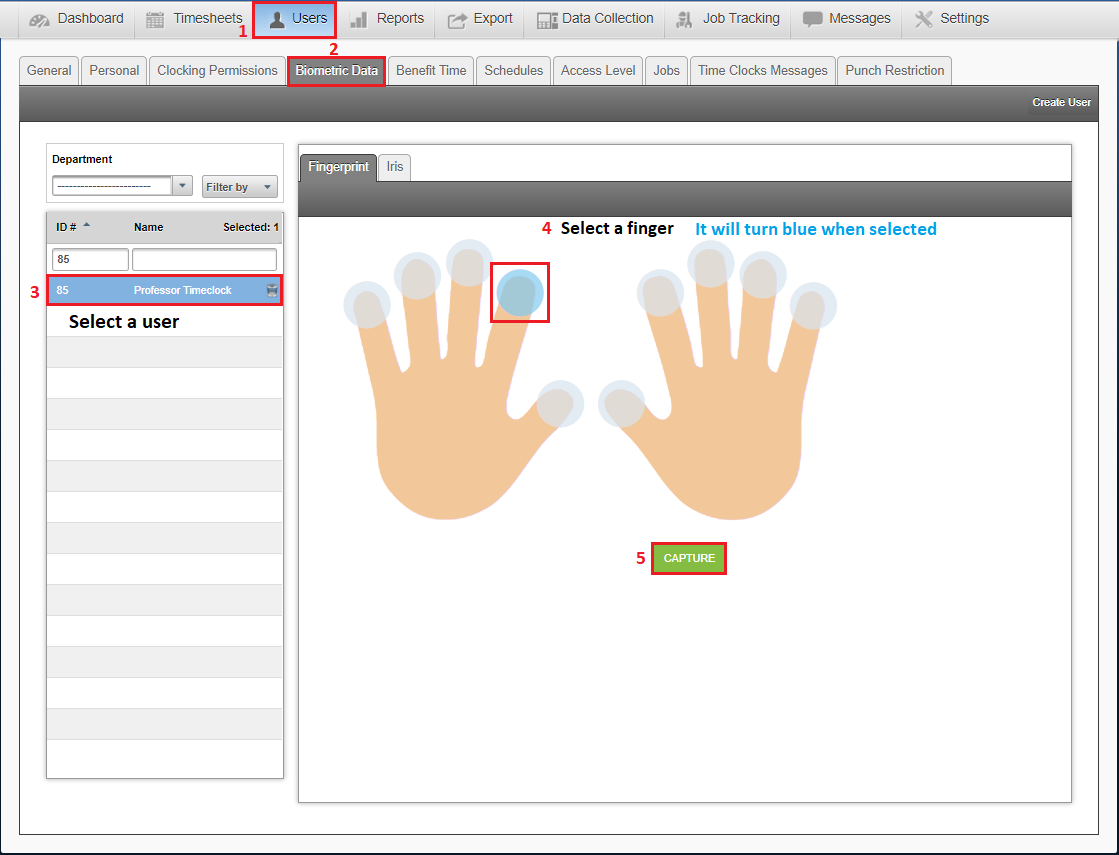
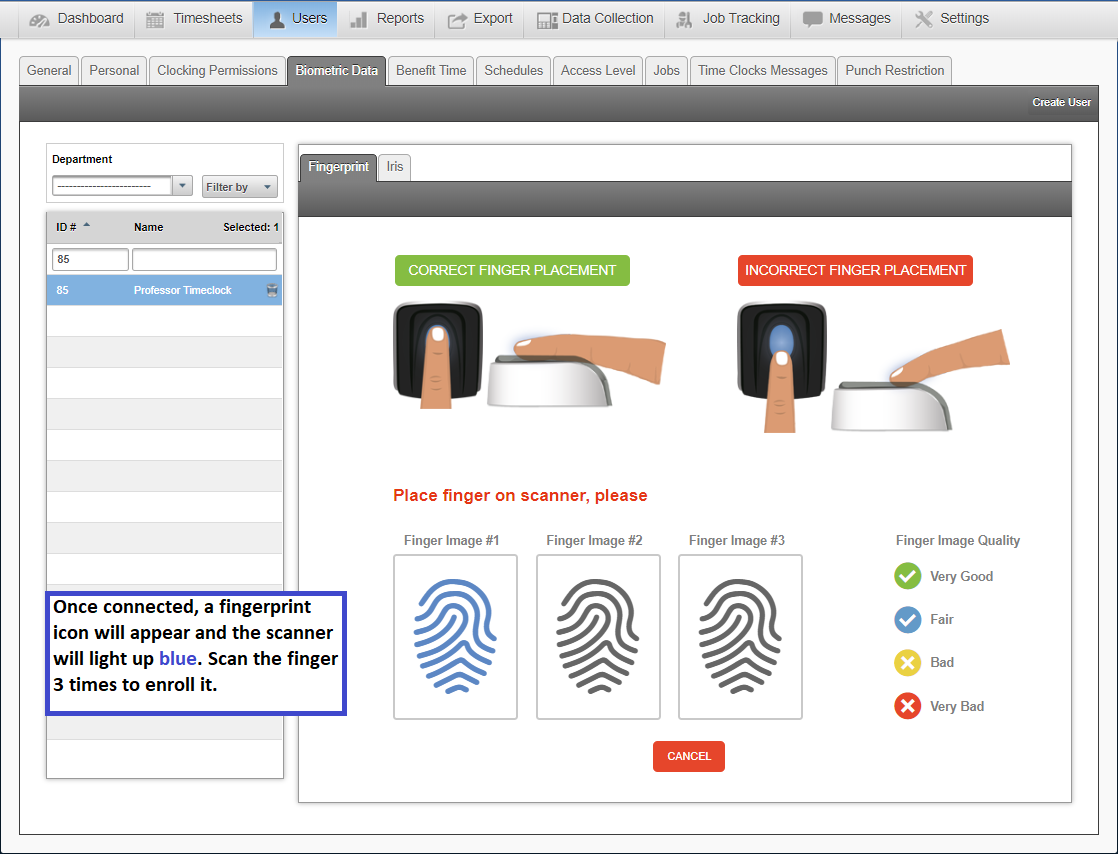
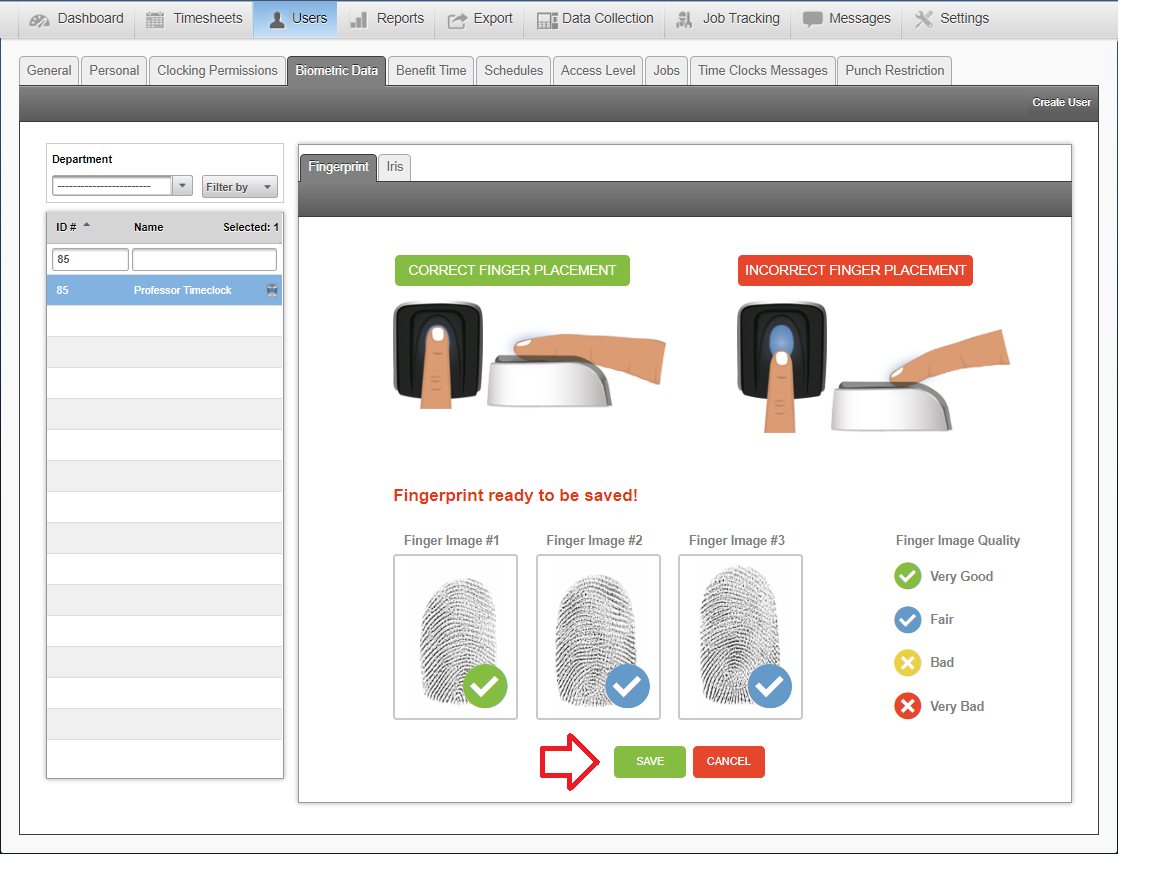
3. Select a fingerprint and click “Capture”
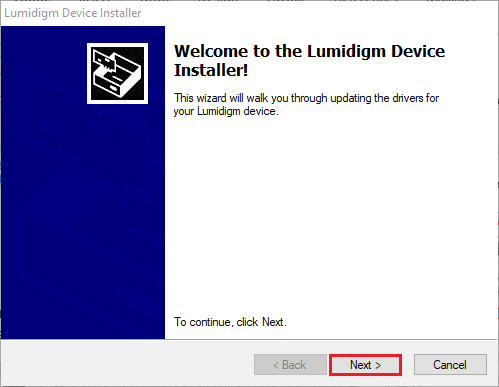
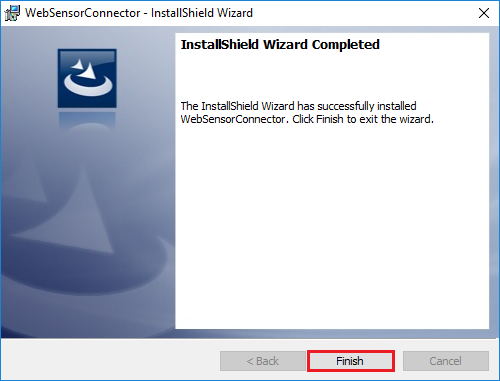
4. Download the driver to your computer
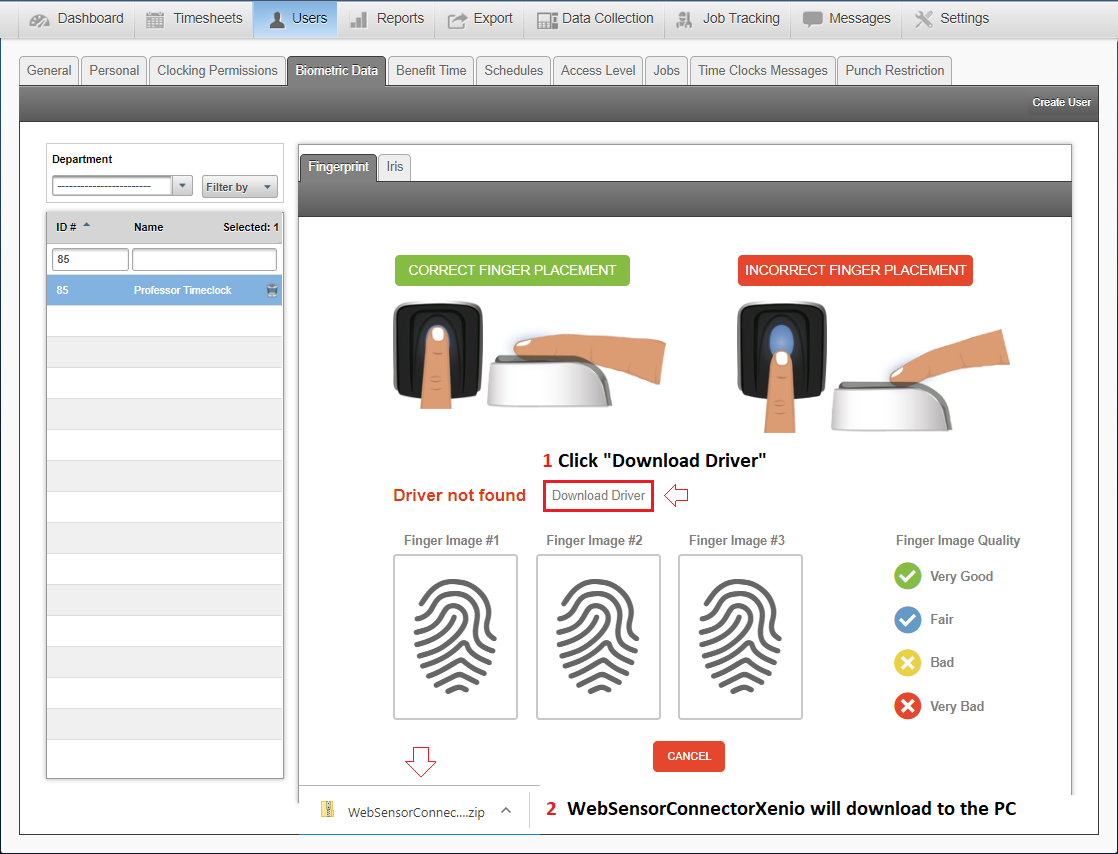
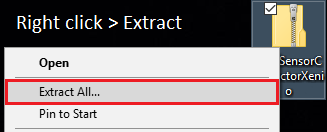
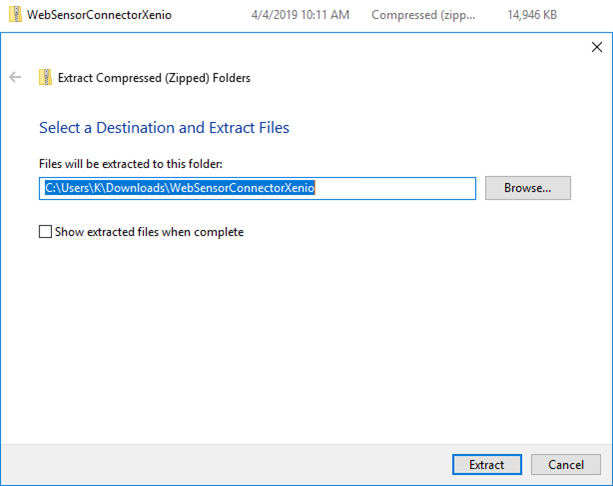
5. Extract WebSensorConnectorXenio to a location on your computer
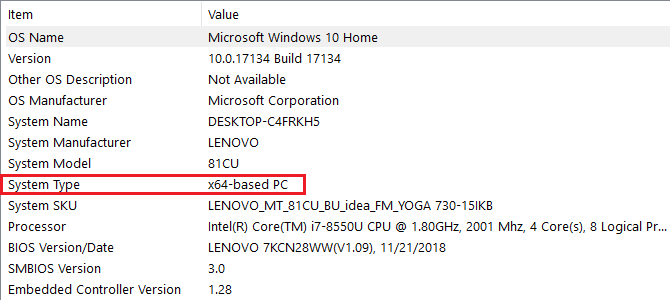
6. Check if the PC is running x64 or x86 version of Windows

Hit the windows key and search “System Information”.

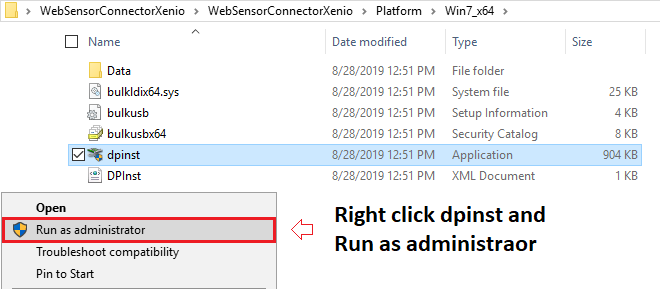
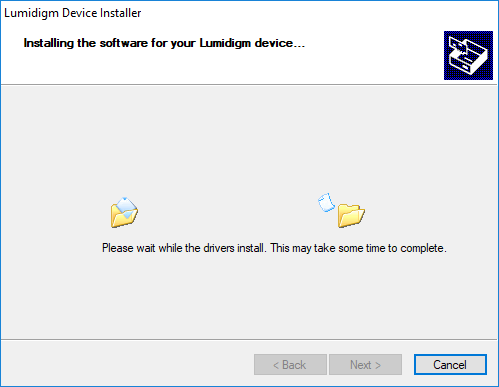
7. Navigate to WebsensorConnectorXenio>Platform>Win7_x64
(or Win7_x84 for 32 bit systems) and run dpinst.
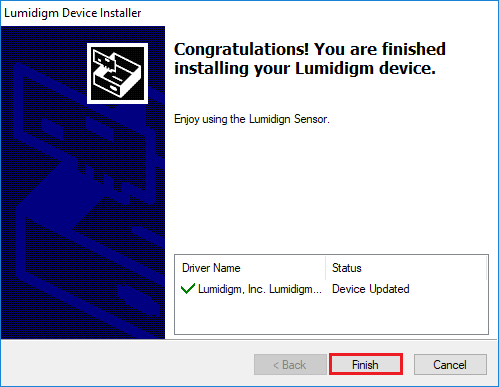
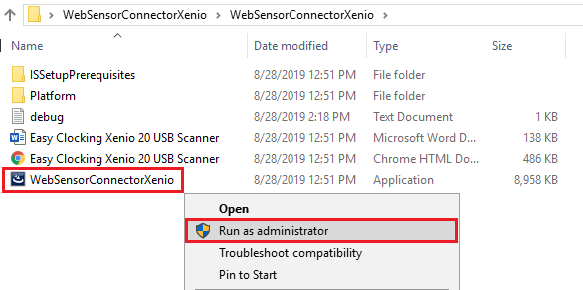
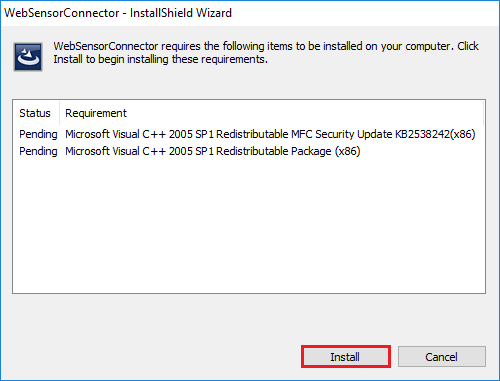
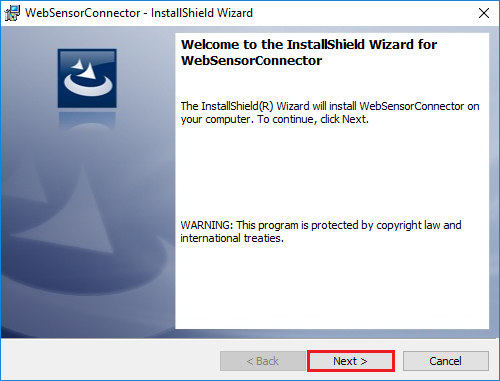
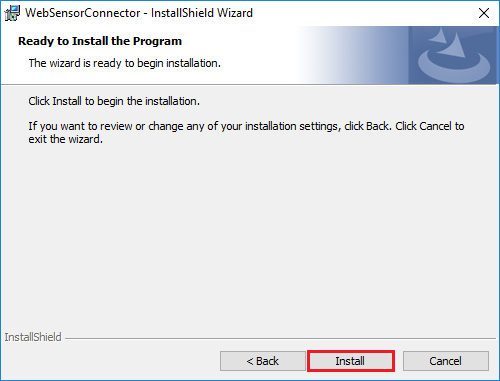
8. Go back to the WebSensorConnectorXenio main folder and run WebSensorConnectorXenio as an Administrator
9. Go back to the software and click “Capture”. Make sure the Xenio 20 USB Scanner is plugged in to the PC.

10. The Xenio 20 Scanner should now connect successfully and be ready for use.

| If you have any questions please let us know.Email: support@easyclocking.com
Phone: 1-888-783-1493 |