Pay Class
Pay Class is a set of rules that define how an employee gets paid for his worked hours. When the software is initially configured, a pay class must be created by default.
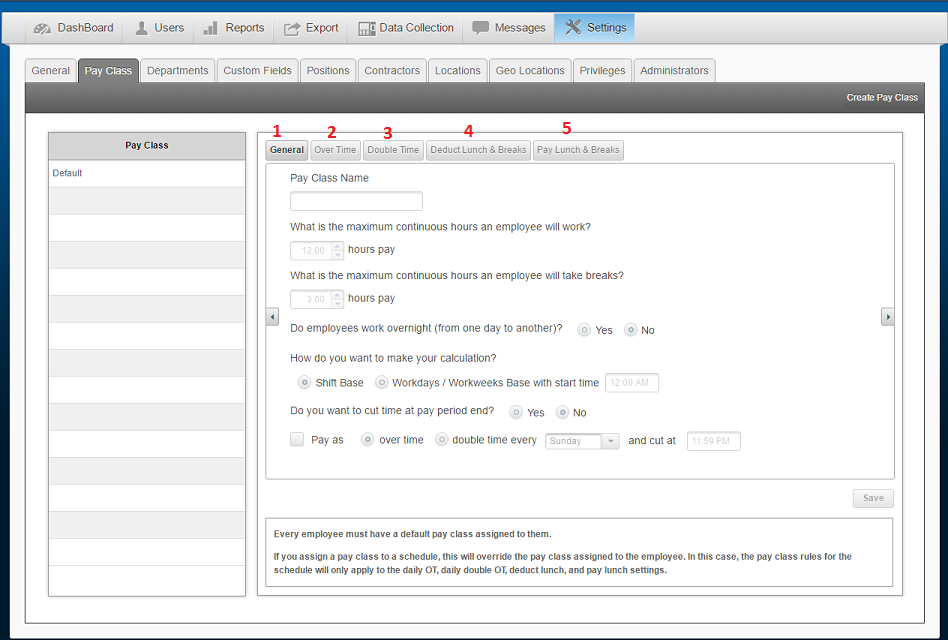
1. General – this is where you will fill out the general information for the pay class
Pay class name – This is the name for the pay class.
What is the maximum continuous hours an employee will work – Enter the maximum hours an employee might work on a specific shift. This setting will allow the software to calculate the hours an employee works on a specific shift, and especially useful for employees that work overnight, from one day to another.
What is the maximum continuous hours an employee will take breaks – Enter the maximum break time for an employee. This feature is important for the software to distinguish one shift from another.
Does an employee work overnight – Enter yes if an employee works from one day to another on a continuous shift. For example, if an employee comes in to work on Monday @ 10PM and leaves work on Tuesday @ 6AM, this is considered yes.
2. Overtime – this is where you will stipulate the overtime rules for this group of employees.
Do you pay overtime – Select whether you pay employees overtime or not.
How do you pay overtime – If you selected yes to pay overtime, then you have two options on how to pay overtime.
- Overtime Daily – If you pay overtime daily, check mark the first selection and enter after how many hours in a day to pay overtime.
- Overtime Weekly – If you pay overtime weekly, check mark the second selection and enter after how many hours in a week to pay overtime.
- You can choose to pay daily, or weekly or both daily and weekly overtime.
What is the overtime rate – Here enter the rate of how much you pay for overtime hours.
3. Double time – this is where you will stipulate the double time rules for this group of employees.
Do you pay double time – Here you enter if you pay employees double time or not.
How do you pay double time – If you selected yes to pay double time, then you have two options on how to pay double time.
Double Time Daily – If you pay double time daily, check mark the first selection and enter after how many hours in a day to pay double time.
After a number of consecutive days worked – If you want to pay double time after a number of consecutive days worked, checkmark the second selection, and enter after how many consecutive days worked would you like to pay double time. If the employee must work a certain number of hours on that consecutive day when double time is due, then checkmark the third selection and enter the number of hours. If the employee must work a certain number of hours for the week to receive double time, then check mark the fourth selection and enter the number of hours.
4. Deduct lunch & breaks – This is where you can set up if you want to automatically deduct TIME for the employees’ lunch and/or breaks. Your employees will not be required to clock in/out for lunch or breaks.
- Enter the total time of lunch & breaks you want to deduct in minutes.
- Enter after how many hours worked would you like to deduct lunch.
- Note: If the employee clocks in and out for lunch and breaks, the software will deduct lunch & breaks accordingly. For example, if you want to deduct 1 hour of lunch and the employee clocks out for 50 minutes, the software will still deduct 1 hour. If the employee clocks out for more than 1 hour, then the software will calculate the higher number
5. Pay lunch & breaks – If you want to pay for lunch and breaks, select yes in this section.
- Enter the amount of time you want to pay for lunch and breaks in minutes.
- If you want to pay for lunch and breaks and count them as regular worked hours, then select ‘yes’ to the last selection. Selecting ‘yes’ will add the paid lunch and break hours to regular worked hours, and will count towards overtime. Selecting ‘no’ will not calculate the total hours towards overtime.
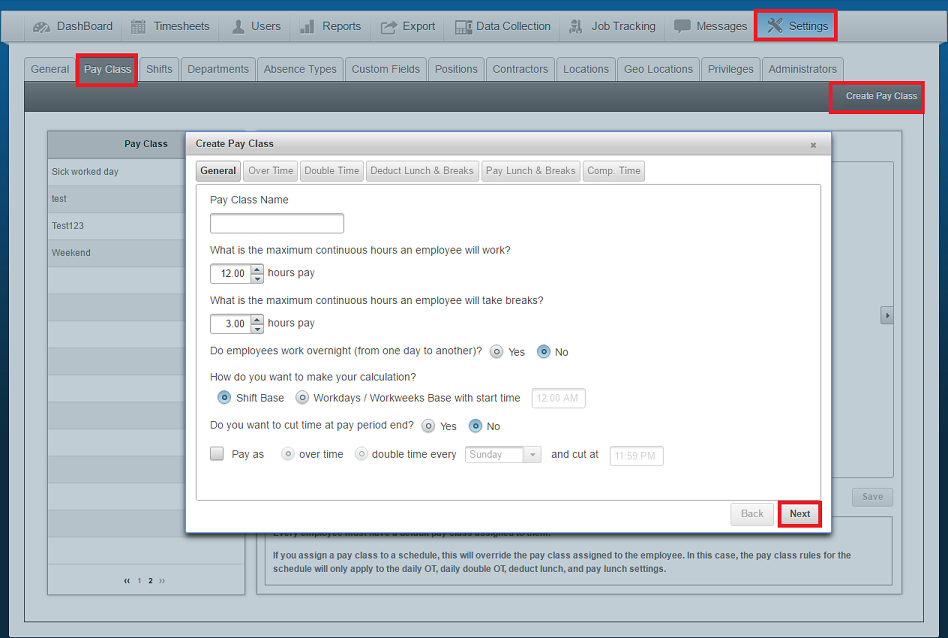
How to create a Pay Class:
- Click on Settings then Pay Class.
- At least one pay class is mandatory in the software, the Default pay class cannot be deleted.
- You could edit the pay classes if needed by clicking on the pay class name from the list.
- To create a new pay class click on the Create Pay Class button towards the top right.
- You will be guided through a set of questions to help you configure the pay class accordingly in the sequence described above.
- Once the pay class has been added, it will be displayed on the on the list to the left.
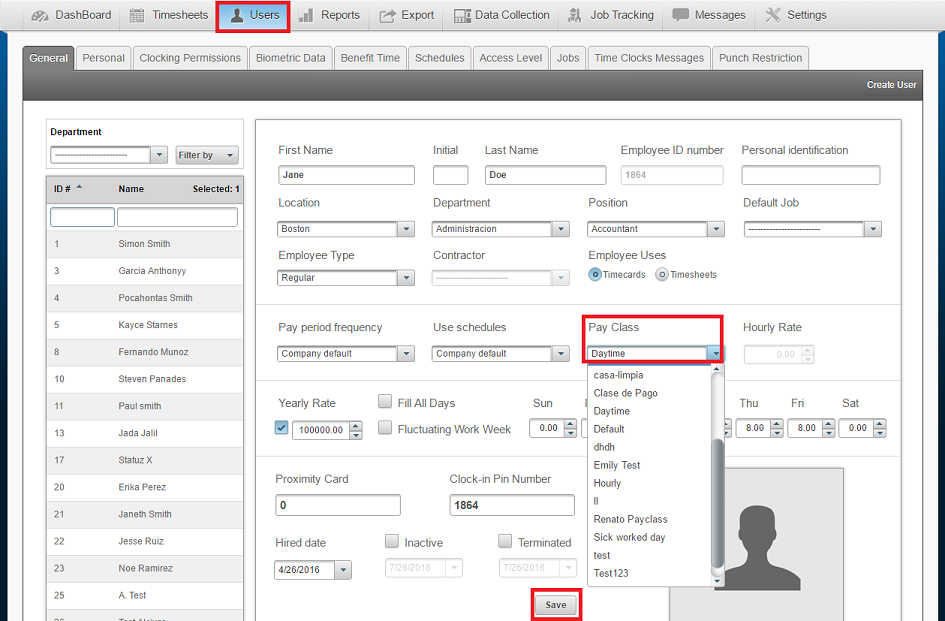
How to assign a pay class to an employee:
- Click on Users then click on the employee in reference.
- On the right select the Pay class for this user and then click Save.